Tunic’s Overworld is jam-packed with fairies, hidden away. Out of every zone, it has the most by far. You can even catch enough fairies to be awarded the manual page without needing to journey to any other area. Some are pretty straightforward, others are challenging, and that one with the light reflections can fall off a cliff for all we care.
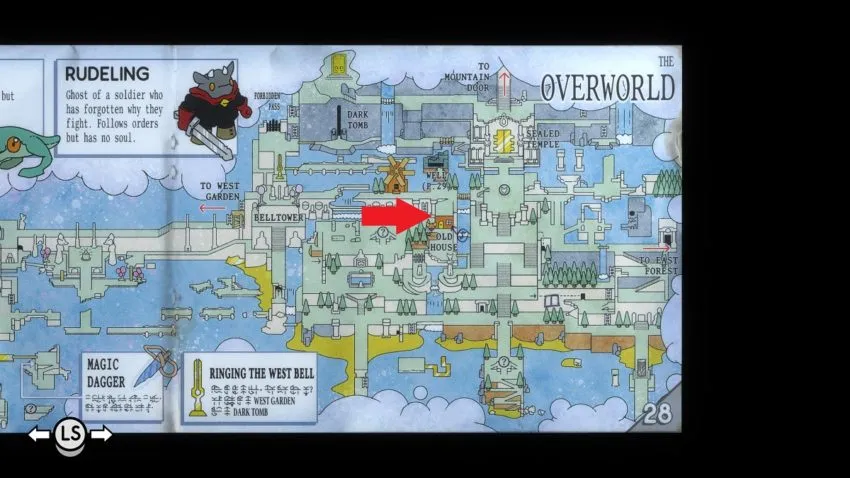
Abandoned house
This one might be the easiest to find, but you need to know a little trick. There’s a tapestry hanging on the wall of the abandoned house, and it looks suspiciously like a code for your Holy Cross (D-pad on a controller, arrow keys on a keyboard). However, if you just follow the path, you won’t be awarded with a chest. That’s because of all the little intersections littering the track. Each time one of those shows up, you have to hit the direction a second time.
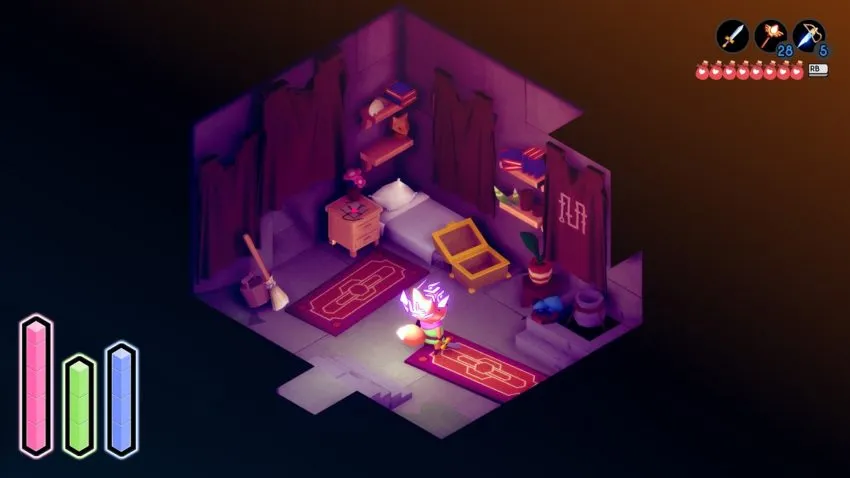
If you can’t quite get that chest to appear, the combination is: Up, up, right, down, down, right, up, up, right, down, down, down.

Main hall
Behind the (formerly) sealed door, is a path of blue tiles that lead to and wrap around a statue of three foxes. Knowing that there’s a fairy in the room, the path becomes an obvious code for your Holy Cross, but it has a couple of tricks up its sleeve. The first is that a column obstructs both sides of the path in a strategic spot that hides a knot in both of them. The trick to decoding them is to recognize that each path is a mirror image of the other, so the two obscured knots are on both of them. Lastly, there’s an intersecting line on both sides near the statue, which indicates you have to hit that direction twice.
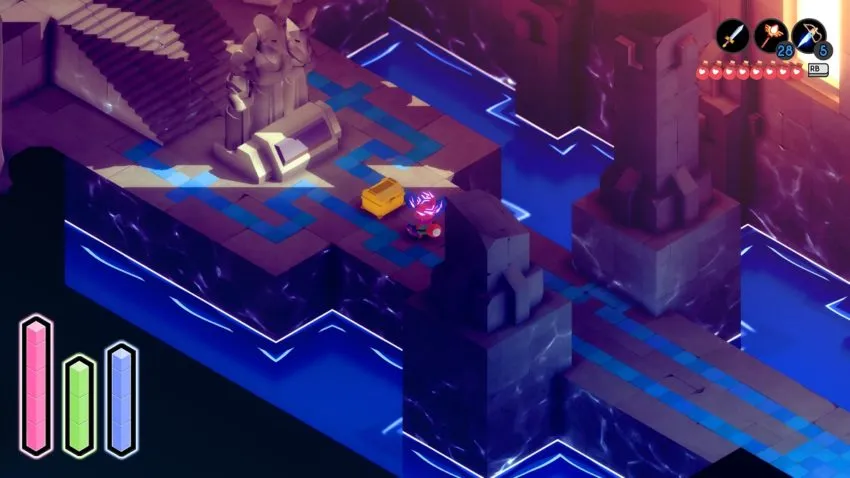
If those instructions still aren’t getting you through, the full combination is: Up, left, up, right, up, left, up, right, up, left, down, left, up, up, right.

Moss wall
This puzzle would be straightforward, but it decides to be a jerk. This brick wall located south of the western bell has a secret. Check out the moss growing on it, and think of your Holy Cross. Just follow the path made by the moss, but then stop and wonder why it didn’t work. The moss track actually extends around the right corner of the wall. If you walk down the path there, the camera will shift showing you the rest of the puzzle.
If the camera shift is throwing you off, here is the solution: Up, right, up, left, down, left, up, left, up, right, down, right, down, right, up, left, up, right, down, right, down.

The compass
We have to do a little bit of translating for this one. On the east end of the overworld near the entrance to the East Forest, there’s a compass on a stone block. Reading it will slap a number of incomprehensible characters on your screen. In order to get the fairy here, we need to make the incomprehensible comprehensible. The best way to do this is to look on the Ruined Atoll page in your instruction manual. In the lower-left corner is a compass, marked with the symbols for North, east, south, and west. Make note of which one is which, then follow along with the compass’ inscription on your Holy Cross.
To save yourself a notebook page, the solution is: Left, right, down, up, up, down, right, left, up, right, down, left, up, down, right, left.

Flower field
Near the entrance to Eastern Vault, there’s an island with on large pink flower and a series of smaller white ones. The big pink flower is large enough to give away that a secret is located here.
To solve this one, you need to imagine the flowers on a grid. Start with the pink one and trace a line to the first flower that intersects with the row or line that it is on. Then repeat that until you’ve connected all the flowers and you will come up with your path.
To make sense of this, here is the solution: Up, left, down, left, down, left, down, left, up, right, down, right, right, down, right.

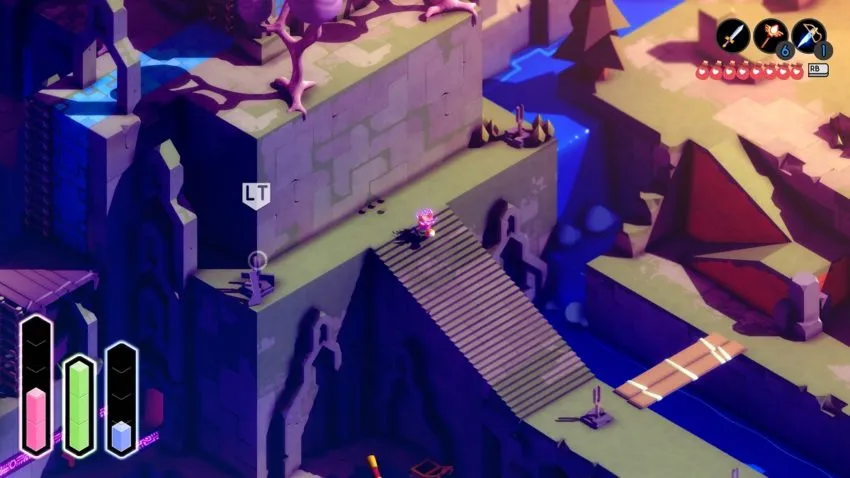
The invisible path
You may have found this earlier and felt satisfied that the caved was plumbed of its secrets, but it has one more. It’s located underneath the large bridge you cross at the start of the game. The invisible path that you walked for the chest in the middle? That’s also a code for your Holy Cross. Simply take note of the turns you take and key the directions into your d-pad (or arrow keys).
If you’re having trouble keeping it straight, here’s the full path: Up, left, down, left, up, right, down, right, up, right, down, left, up, left, up.
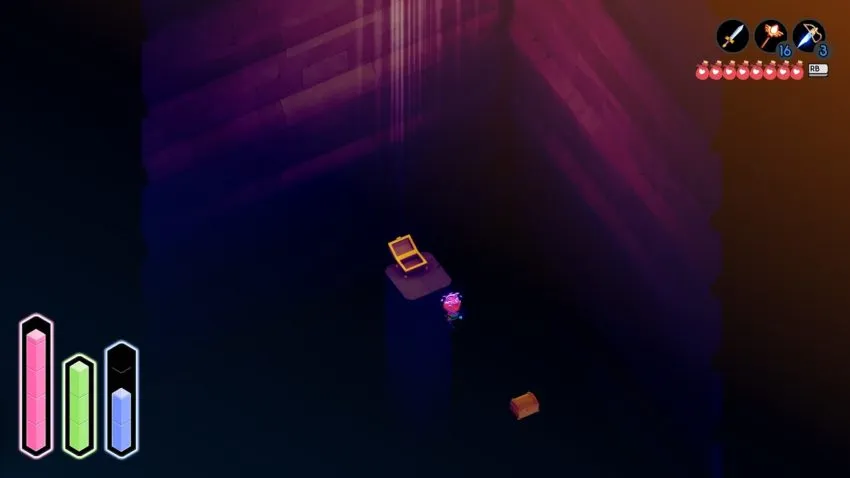
The shimmers on the wall
Underneath the bridge that leads to the Old Burying Ground is a big headscratcher of a puzzle. It might be obvious how to attempt it, but actually reading it is another matter. Simply, the water reflects shimmers onto the wall, and if you watch long enough, you’ll notice the telltale signs of a Holy Cross code. Unfortunately, they rotate and stretch across the various angles on the wall. You have to try and keep the path in perspective as it twists across the screen.
Can’t keep it straight? It’s hard to blame you. Here is the final puzzle solution: Right, up, left, up, right, down, right, up, right, down, left, down, right.

The fountain
This can be a bit difficult to figure out if this is the first time you’ve done one of these puzzles in Tunic. Just west of the center of the Overworld is a square pond with an island in the middle. On each side of it are clusters of blue tiles. The key to figuring this one out is to look at how many tiles are in each cluster. For example, at the bottom of the fountain is a lone tile, while the left side has a cluster of two and another of three. To solve the puzzle, you need to press the directions in the order corresponding to those clusters. So first would be down, then left twice.
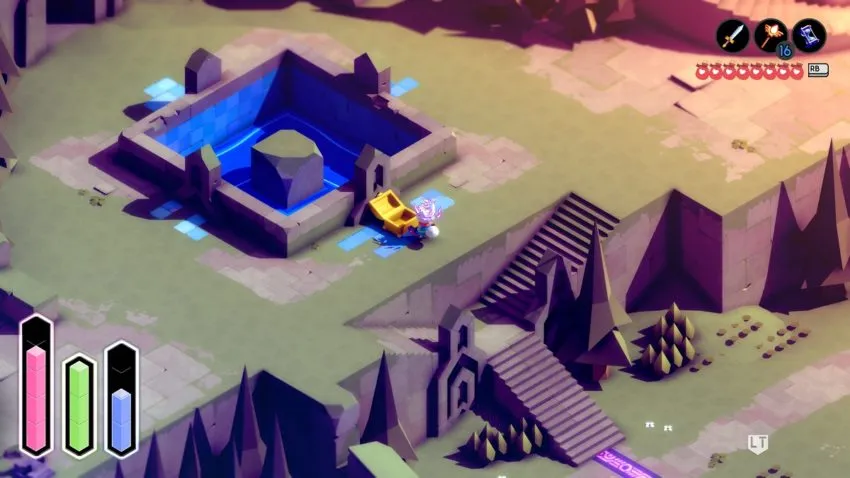
For clarity, here is the solution: Down, left, left, down, up, right, down.

The tower
This one is a bit of a two-parter. Underneath the bridge that leads to the Ruined Atoll, there’s a room with turrets in it. At the end is a door marked with what you probably recognize by now as a code for the Holy Cross. Input the code (Right, up, left, up, right, up, left, up, up, right, down, left, down, right, down, left, down, right) and proceed into a tower that rotates as you climb it.
It’s tempting to just climb to the top, but you won’t find your reward there. As it turns out, your path up the tower is another code for your Holy Cross. Take note of all the directions you move, as you’ll need to input them at the top.
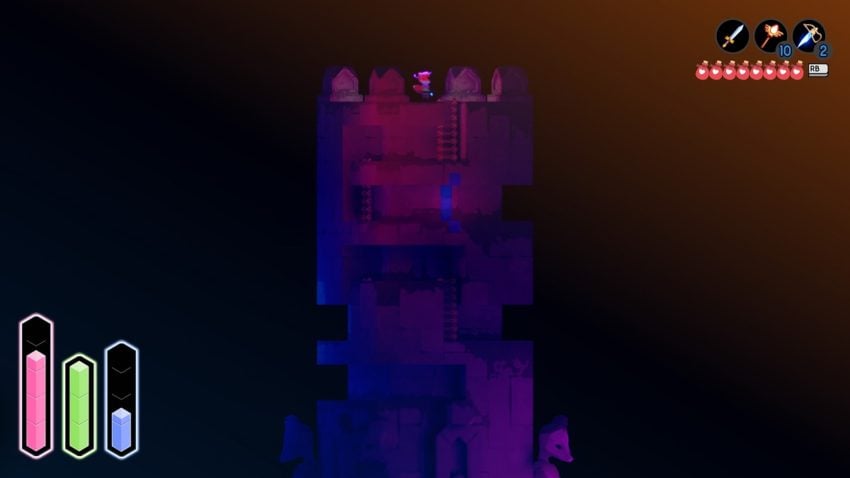
If you’re having trouble keeping track, this is the full solution: Left, up, right, up, right, down, right, up, right, up, left, left, left, up, right, up.

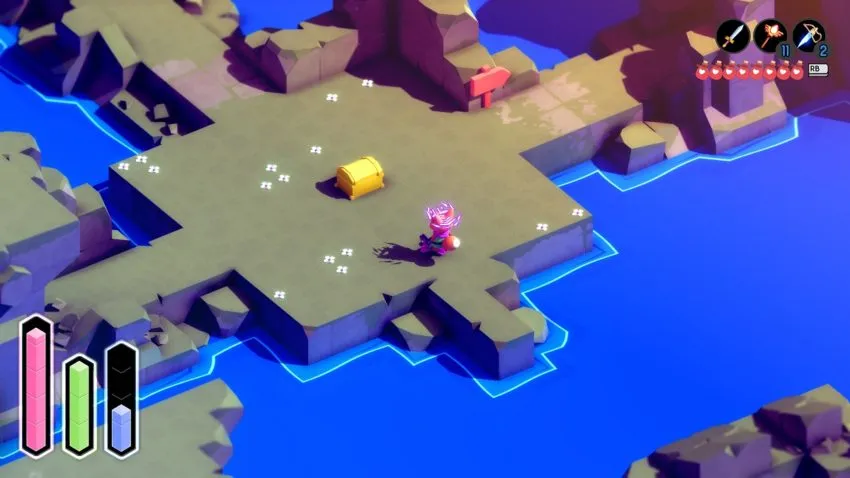
Flower island
On the southern part of the Overworld is a square island with flowers on it. If you’ve done the flower puzzle closer to the Eastern Vault already, this one will be a piece of cake. Simply imagine the flowers existing on a grid, and trace a line from one to another, starting with the big pink one, whenever one lands on the same line or row.
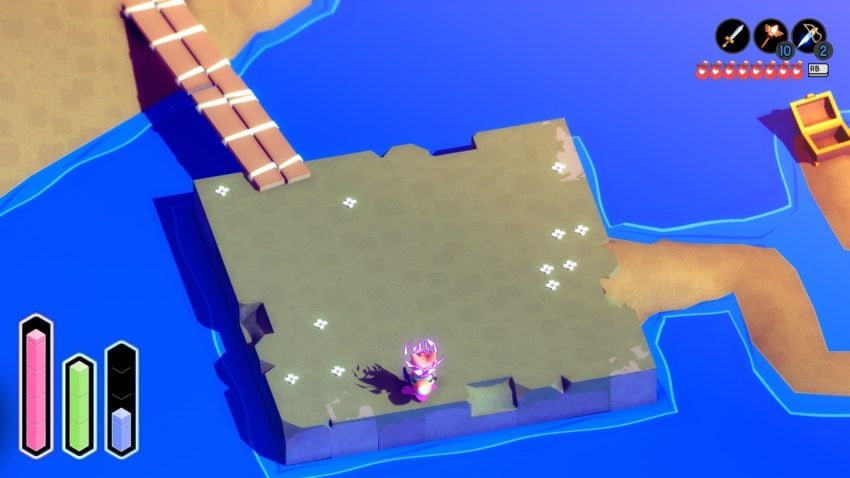
If that doesn’t make sense, here’s the solution: Up, right, down, left, down, left, down, left, down, left, up.

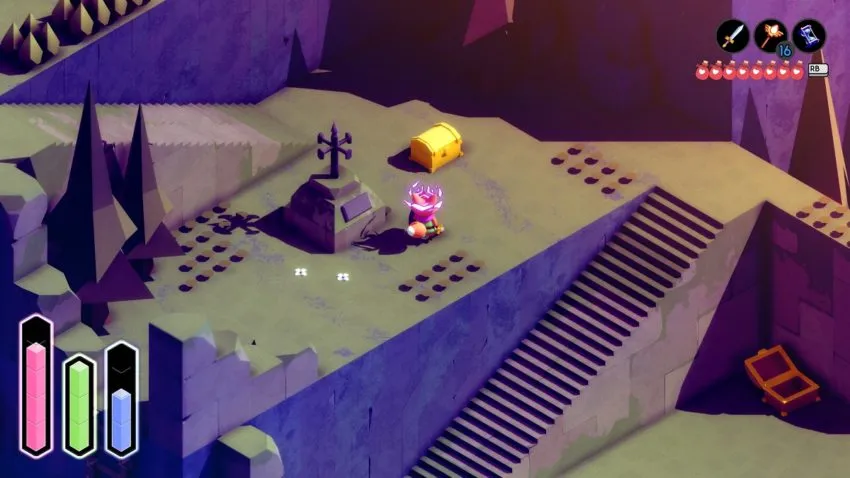
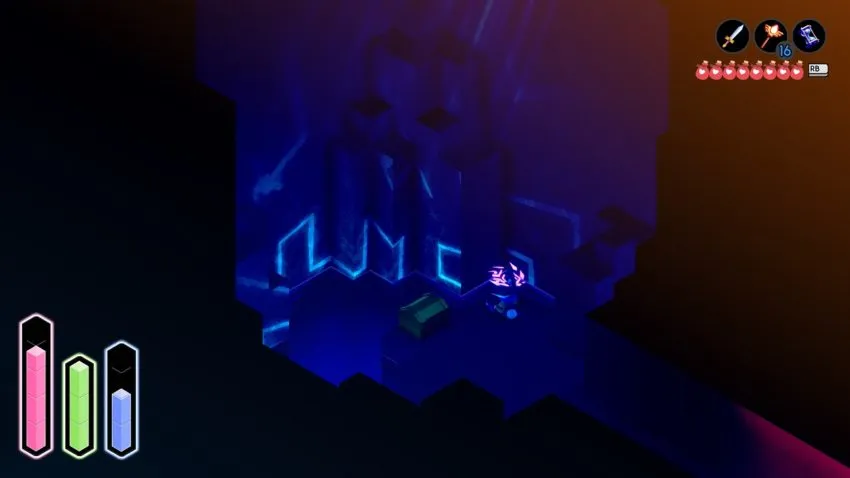
The cube
This is one of the rare secrets hidden behind a destructible wall. Across from the headless statue is one that still has its melon attached. Down the staircase that circles it is a dead-end that can be blown open with a firecracker. In the newly discovered cave is a peculiar sight: a golden cube that slowly rotates. It’s telling you a code for your Holy Cross. Simply follow its rotations on the d-pad or arrow keys.

This is its movements: Right, right, right, right, up, up, up, up, right, right, right, up, up, up, right, right, up, up, right, up.

Wandering monster
Far in the north-east of the Overworld, at the bottom of two ladders, is a grotto behind a waterfall. There’s a chest there, but that’s mostly a misdirection. Hidden in the shadows is a darkened path, but as you reach the end of it, the camera zooms out and reveals an enemy lurking in the gloom. He’s okay. He wanders about, doing his own thing. Watch carefully, because his movements are a code for your Holy Cross.
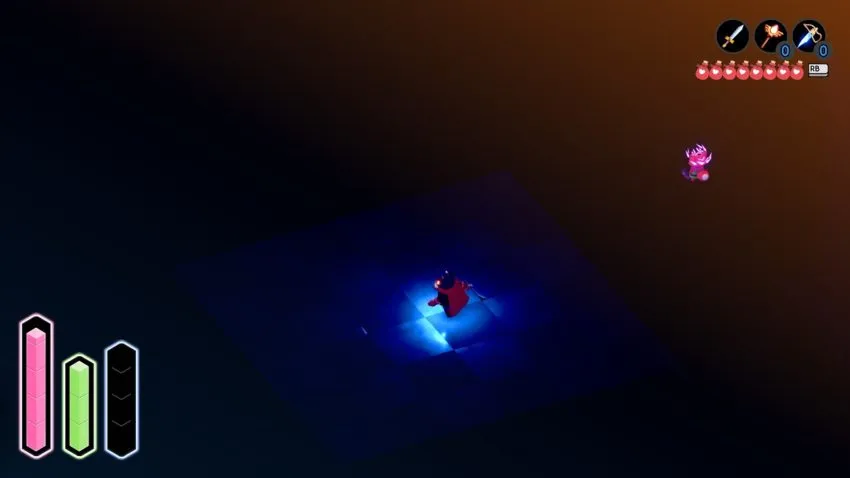
If you’re having trouble putting the whole sequence together, here it is: Down, down, right, up, right, down, left, down, right, up, right, down, down.

The fairy gathering place
Behind a waterfall west of the main hall is where all your collected fairies go. That’s not its only purpose, however. It too conceals one of the fairies. If you check the walls, you’ll see the telltale markings of a Holy Cross code. Just one problem: the codes on both sides are partially obscured. To get the full code, you’ll need to compare both sides to fill in the blanks.
Here’s the full blankless solution: Down, right, up, right, up, right, up, left, up, left, up, right, up, right, up, left, down, left, down, left, down, right, down, left, down, right, down, right, up, right.
As a reminder, if you’re having trouble finding the location, pressing up, left, up, right, down, right on the “Holy Cross” will send three sparkles out that move in the direction of the fairy.