
Call of Duty: Black Ops Cold War Zombies has had a good run, but all things come to an end eventually, unless they’re undead. With the addition of its final map, Forsaken, the beginning of the Dark Aether storyline is coming to a close with a really good map that is fun to play around in and has one of the best wonder weapons we have ever seen in the Chrysalax. For now, though, let’s focus on finishing this chapter by completing the Forsaken main Easter egg quest.
How to complete the Forsaken main Easter egg quest
Before you begin
There honestly is not much you need to prepare yourself for in this Easter egg quest. This quest can be done either solo or as a team and will not require a significant amount of time to complete. The main weapon we will be using is the Chrysalax wonder weapon since it is so good, but if you are playing as a team, grab whatever you are most comfortable with. Field Upgrades are the same; use whatever you like the most. In our solo games, we prefer either Ring of Fire or Aether Shroud.
Lift the lockdown
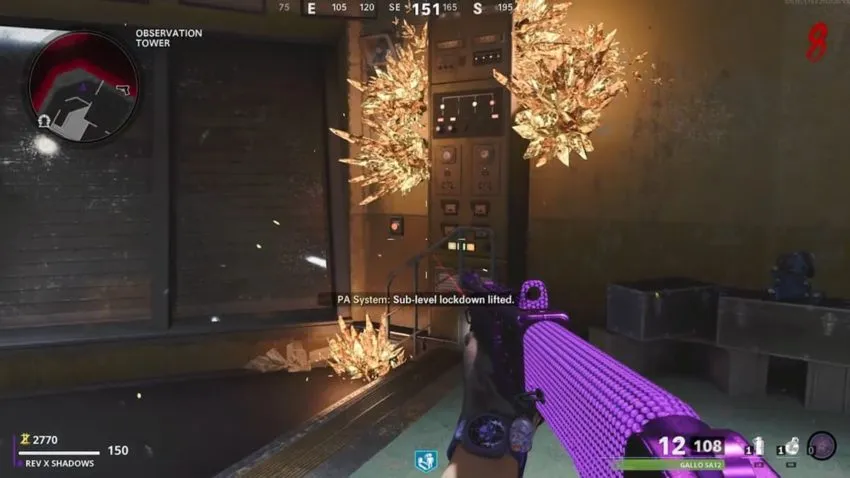
We already have a guide on how to lift the lockdown in Forsaken, so do that. After Pack-a-Punch has opened up, go to the button on the wall next to the shuttered window and interact with it for a cutscene to play. The man we were aiming to bring back from the Dark Aether was actually the big bad all along, The Forsaken.
Get the Chrysalax
You are not required to have the Chrysalax until later in the steps, but the weapon is so good we heavily recommend getting it as soon as possible for as many teammates as possible. Either hit the Trials Machine, the Mystery Box, or build it yourself.
The next three steps can be done in any order.
Get the Fuel Tank
Go to Fuel Processing (the area where you fix the teleporter to get into the bunker. On each of the giant canisters, there are consoles that you can interact with. If you are playing in a team, all members need to interact with these consoles simultaneously.
When the process starts, you will be locked in this area with many zombies swarming in. All you need to do is survive and kill all the zombies here. This is why we recommend having the Chrysalax so you can tear through them quickly. You can check your progress by looking at the orange bars on the side of the canisters. When completed, the Fuel Tank will drop onto the ground in the middle.
Get the Housing Unit
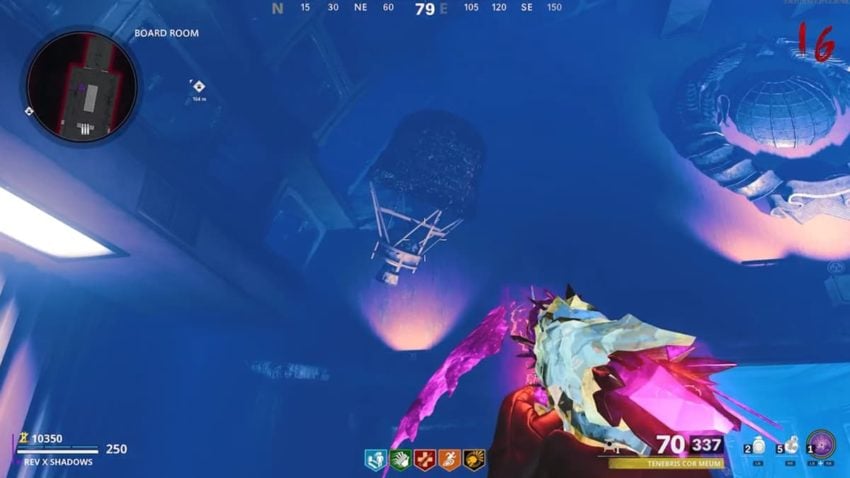
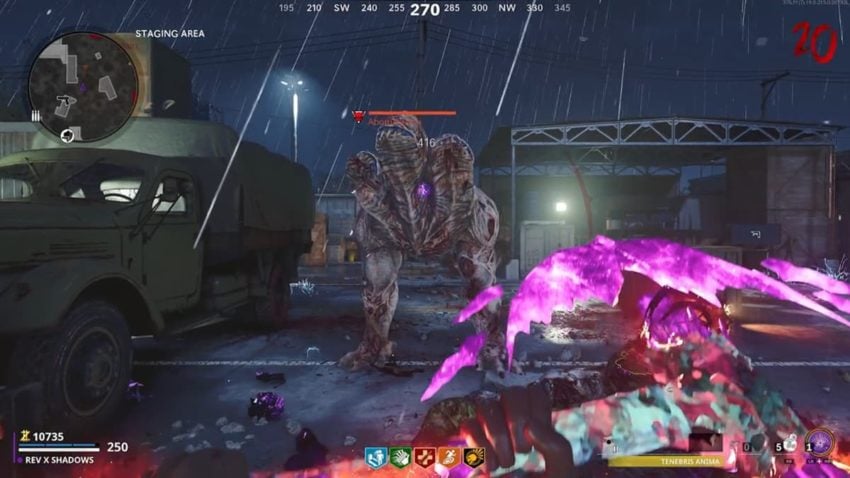
Teleport back to the bunker and make your way to the Board Room. In one of the corners is a suspended object that you need to knock down. For this, advance the rounds until you get an Abomination to spawn. Stand below the object and wait for it to charge at you. Let it hit the wall, and the object will fall, letting you grab the Housing Unit.

Get the Monitoring Device
For the next part, you will need any standard gun with the Deadwire ammo mod from the Pack-a-Punch machine. You can purchase it for 2,000 points.
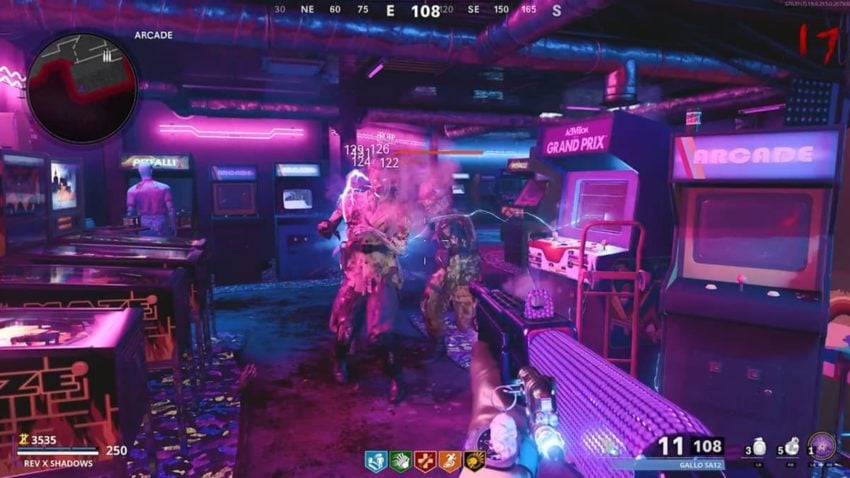
With the mod, go to the Arcade and stand next to the machine called Grand Prix. Shoot a zombie so that it is electrocuted in front of the machine, and it will turn on. Interact with the machine to pay 2,000 points to take control of an ARC-XD.
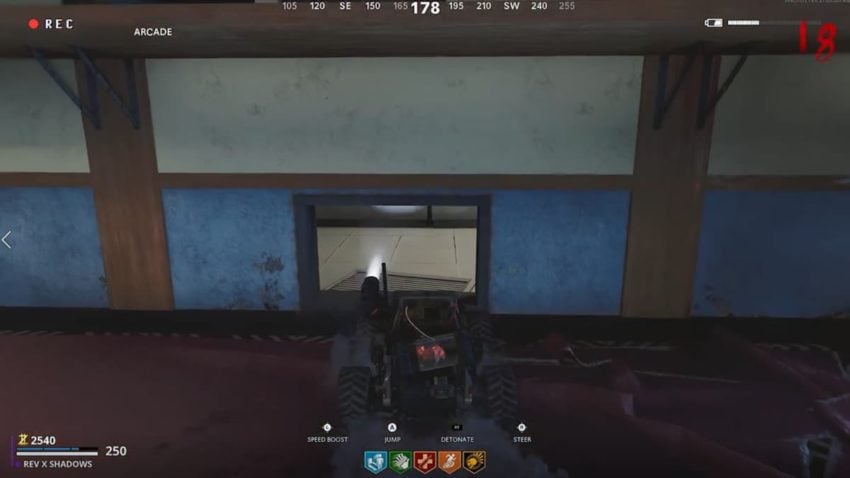
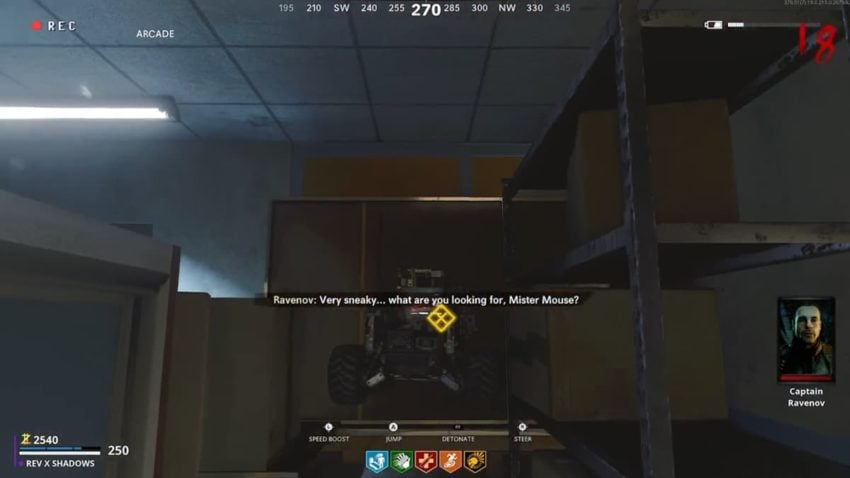
At first, you will be placed in the middle of the arcade machines. Drive your way under the flag and leave the Arcade to make your way to the TV Store across the street. Make your way behind the counter, and there is a vent that the pulse of your car will knock away. Drive through the vent and turn right to find a shelf. Place yourself to the left of the shelf, jump, and then detonate the car to knock that shelf forward.
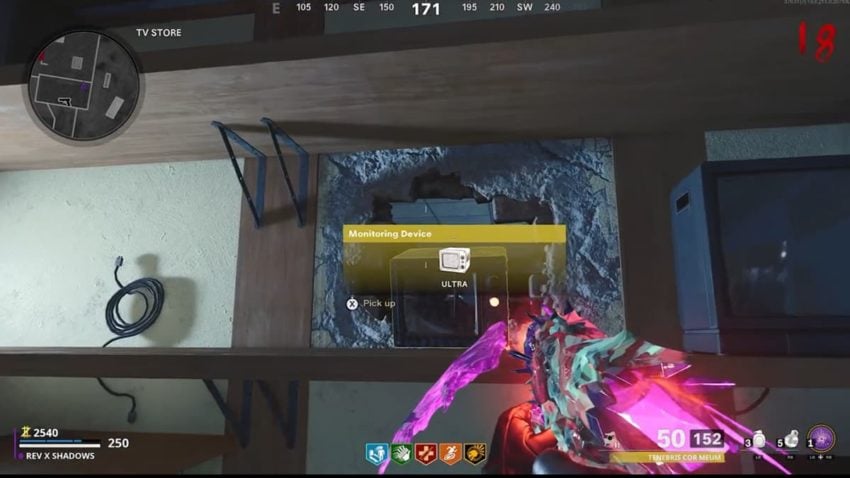
Now that you are back to yourself go to the TV Store and grab the Monitoring Device sticking through the wall.
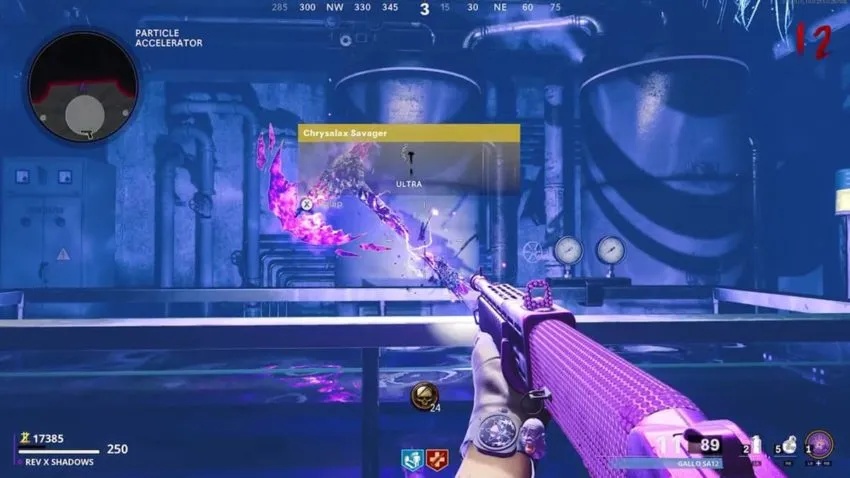
Get the three Catalyzed Crystal Shard
This step requires at least one person to have the Chrysalax. After you lifted the lockdown and began the cutscene, three areas got a large cluster of Aetherium Crystals: The Amplifier, Staging Area (spawn), and Storage Zone 5 Rooftops.
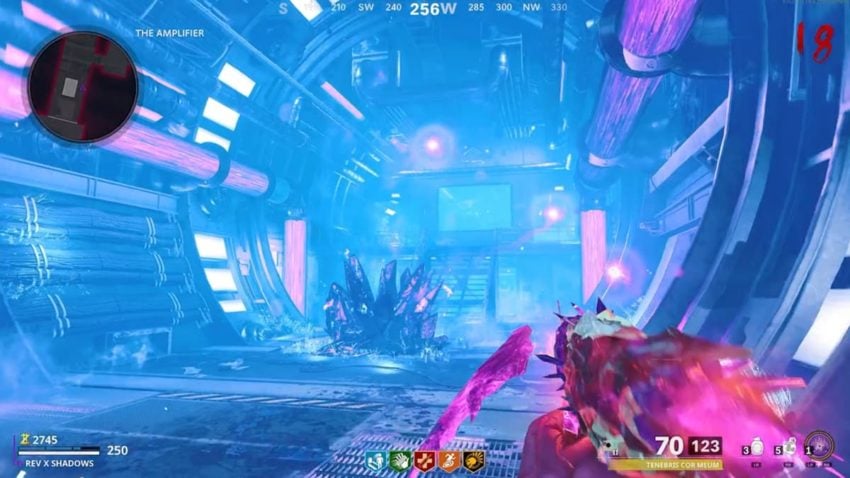
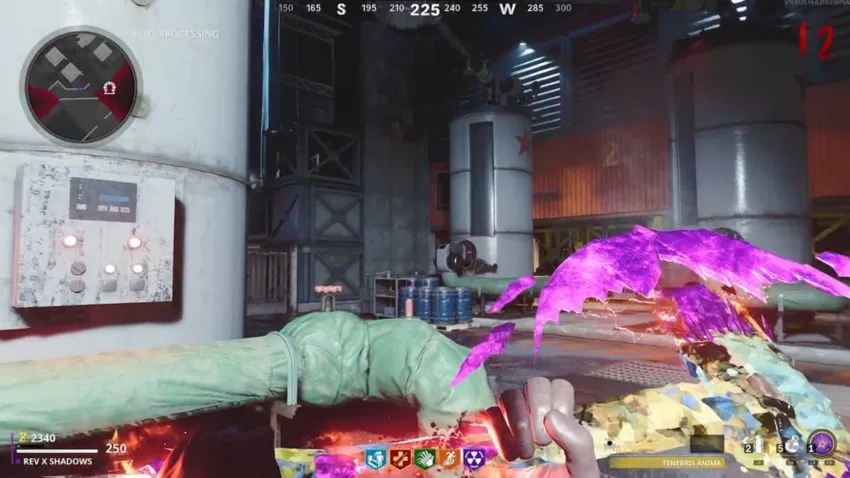
Three purple orbs are floating around every cluster. Shoot them with the Chrysalax to destroy them, but beware, zombies will begin spawning in when you do. When all three orbs are destroyed, switch the Chrysalax to its axe form and melee the cluster to break it. Now there will be a small Crystal Shard item you need to pick up. This will replace whatever tactical equipment you currently have equipped. An Abomination will spawn. You need to throw that shard into one of the Abomination’s mouths. When you do so successfully, its zombie tail will begin glowing orange. Now kill the Abomination for it to drop a Catalyzed Crystal Shard. Repeat this at all three locations.
Also, if you kill the Abomination too early or miss your throw, just go back to the cluster and grab another shard.
Guide the Aetherium Neutralizer
Beware, this is the point of no return. There will be one more spot ahead to upgrade weapons and get perks, but we recommend getting good armor and all your perks for this immediate step. Also, make sure to Pack-a-Punch the Chrysalax as much as possible. Might want to save up some points for the checkpoint ahead as well, as you won’t get much here.
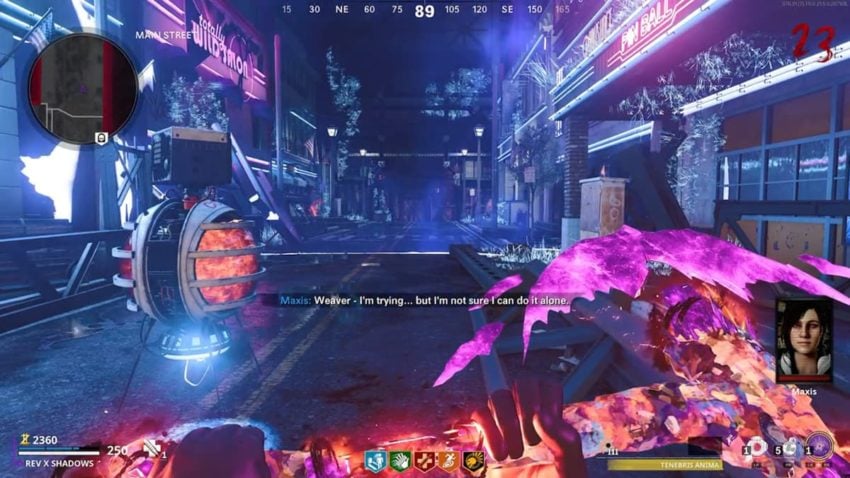
Go to Main Street and interact with the Workbench in the middle of the road to make the Aetherium Neutralizer. When you make it, you will have to wait for the device to charge up, and all the characters will be talking to each other. Just kill zombies as they come in. When it’s ready, the Neutralizer will put out a blast removing the debris.
You will mostly recognize this next step if you have played the second Outbreak main Easter egg quest. The Neutralizer is putting out a safe zone that you can safely walk in without being hurt. However, as you walk with the Neutralizer, zombies will run at you, and it will quickly lose fuel. You need to run out of the safe zone and find orange crystals. Break them, and they drop more of the Catalyzed Crystal Shards. Pick them up and deposit them into the Neutralizer to keep it going.
The farther you go, the more zombies spawn in, making this particularly tricky on solo. If you are low on health, there are not a lot of areas to run to recover since outside the bubble hurts, and zombies run into the bubble. Just try your hardest to kill zombies as they are running upon you. Also, if you are playing in a team, the Neutralizer will not move unless all teammates are within the safe area.
When you make it to the end of the road, the Neutralizer will shut down, and the Pack-a-Punch machine and Wunderfizz will appear. Stock up and interact with the door in front of you to start the final boss fight.
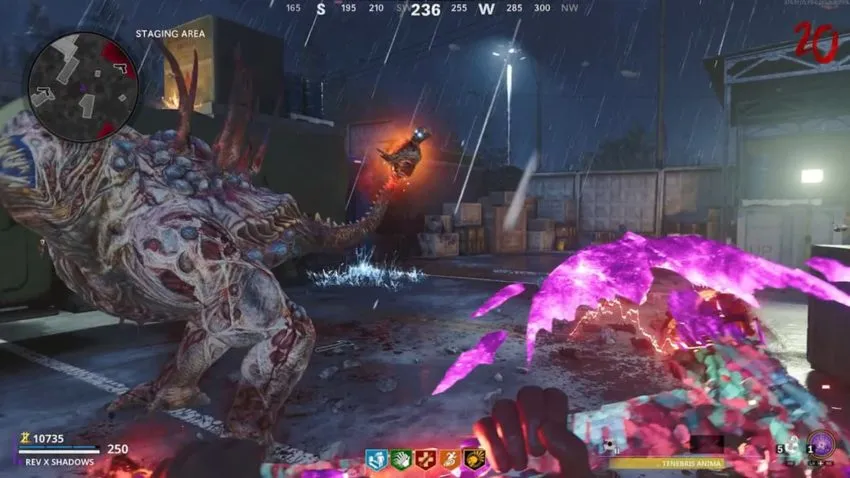
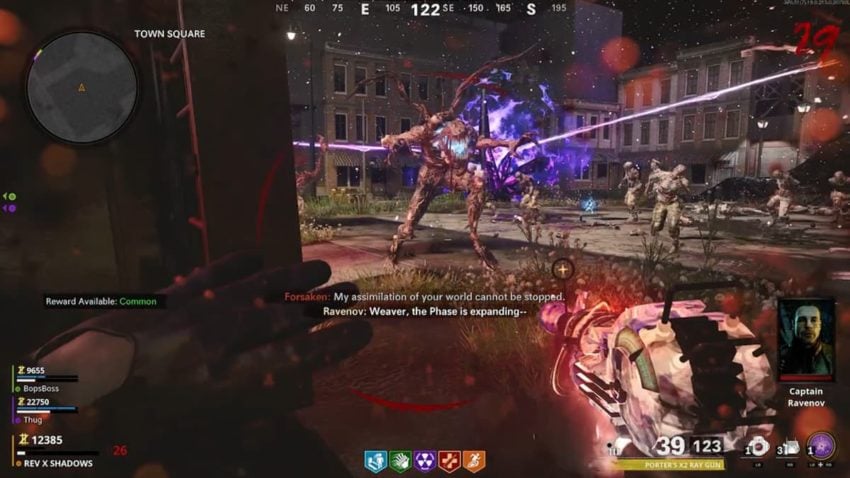
Take down The Forsaken
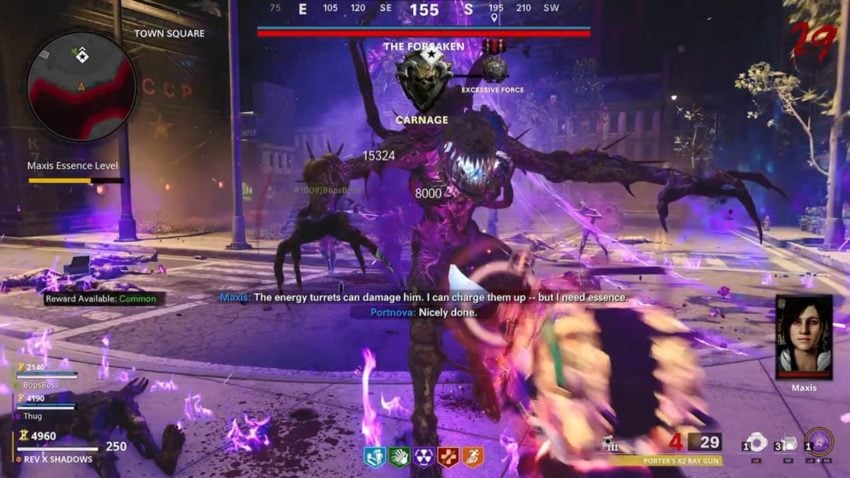
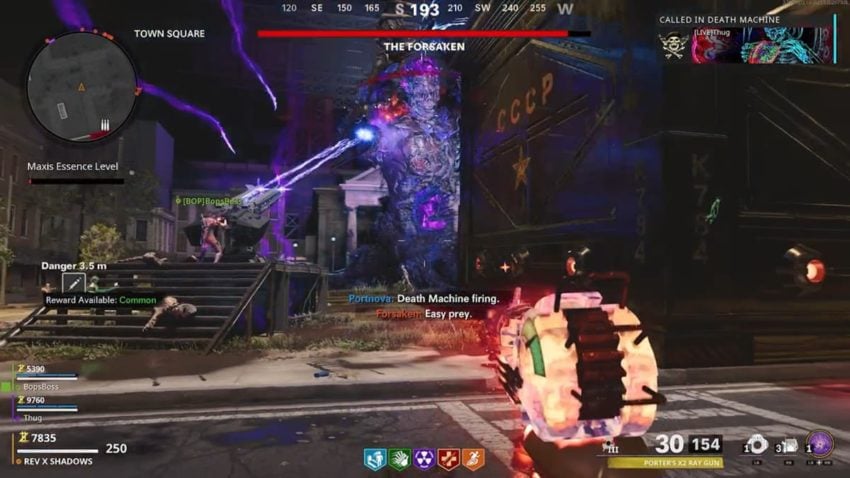
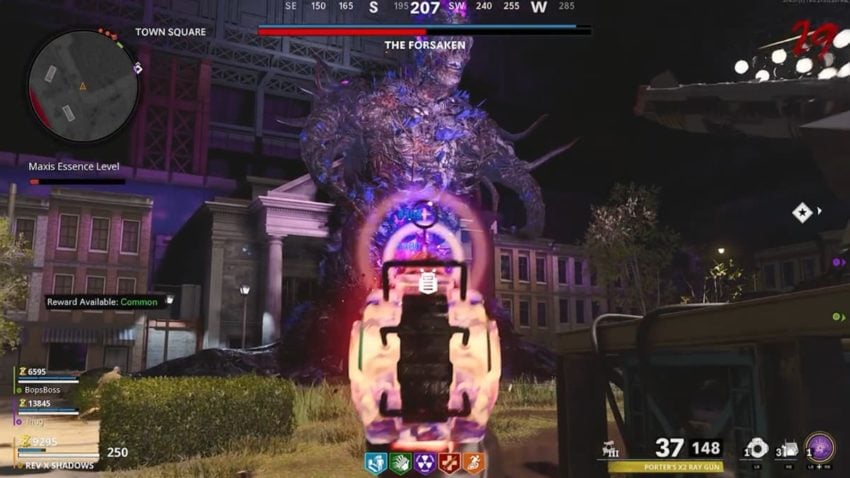
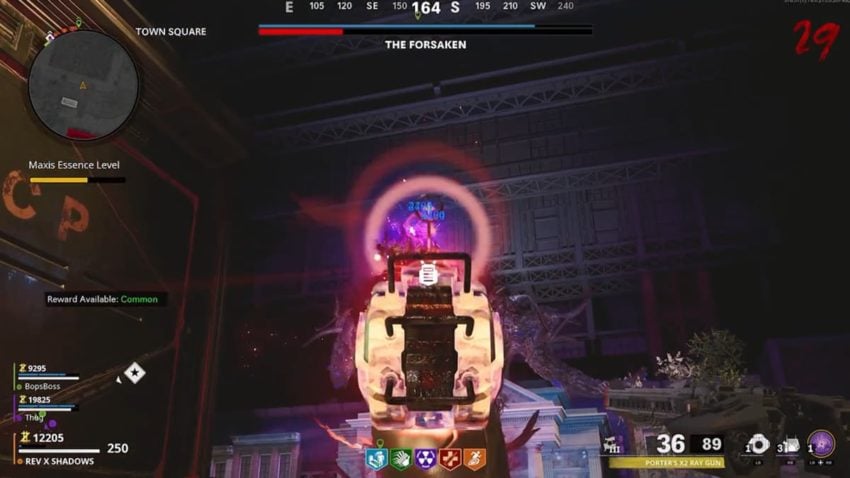
This boss fight is really straightforward, and thankfully, there is no time limit. To start, run forward and shoot off the crystals from both of the Forsaken’s shoulders. Now, you will need to follow Samantha Maxis around the area and kill zombies within the purple aura beneath her. This will charge up essence in Sam, and she will deposit in one of the two big guns on the left or right side of the area. Jump onto the gun and aim at the now red glowing shoulders. If you do not strike it enough, just repeat the essence charging process and do it again. He may recover his health, but it’s not anything to worry about.

Work towards shooting both shoulders, and when you get the Forsaken to half health, there will be a brief interruption in the fight where the Forsaken gives you a vision. When Samantha saves you, the fight is back on.
In the second half of the fight, shoot at the Forsaken’s abs to destroy the crystals there and then do the same essence charging process. When the abs have taken enough damage, the last area to aim for is his head.
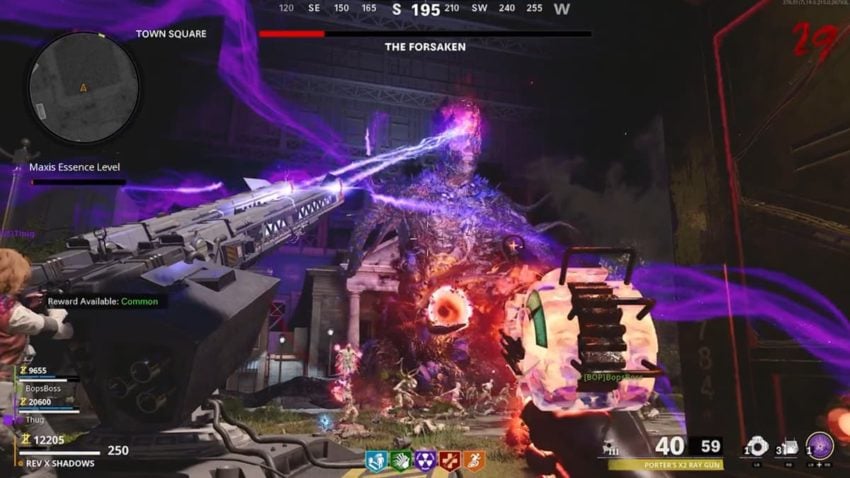
As stated above, this boss fight is very simple. Just go shoulders, abs, and then head to finish him off. If you are running low on ammo, kill higher-tiered enemies like Manglers or Mimics, and they will drop ammo for you. The Forsaken will throw out some area of effect attacks like a freezing blizzard and some orbs, but just avoid them and jump into Samantha’s radius when able. With no time limit, you have all the time in the world and need to focus on surviving above all else.
Once the Forsaken has been defeated, he will unleash Outbreaks worldwide, and you and your team will be slowly hurt over time and go down. Don’t worry; a cutscene will soon begin to play, and then you have finished the main Easter egg quest in Forsaken.


Published: May 17, 2022 5:05 AM UTC