Sapienza is the most iconic location from Hitman 2016. It’s a densely packed town filled with exciting ways for players to kill their targets. This guide explains how to complete your mission in Sapienza with the rank of Silent Assassin.
Bug warning
At the time of writing, there seems to be a bug in Hitman 3 that makes getting a Silent Assassin rating on this mission extremely difficult. There’s one NPC that can seemingly trace a body back to you without any evidence, and it’s hard to avoid him. We’ll point out where you’ll encounter this bug when we come to it, but it should be fixed before too long because it ruins a few core elements of this location.
Loadout
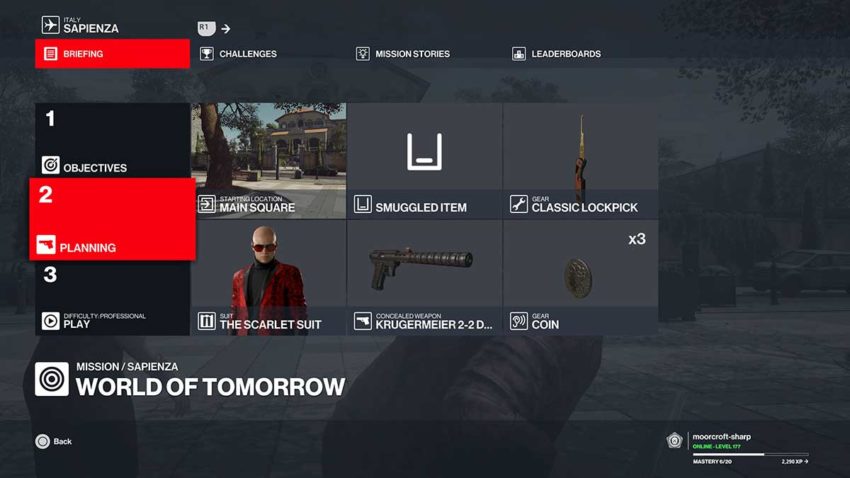
The only essential items for this mission are the lockpick, coin, and silenced pistol. We’ve chosen the Krugermeier 2-2 Dark from the Elusive Target Arcade. The starting location of the main square works because it’s accessible and close to where you’ll be heading.
Step 1: Become a waiter
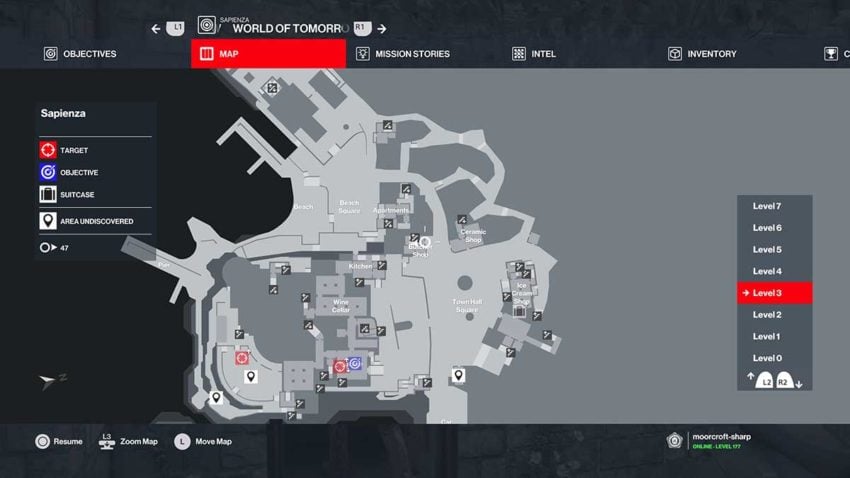
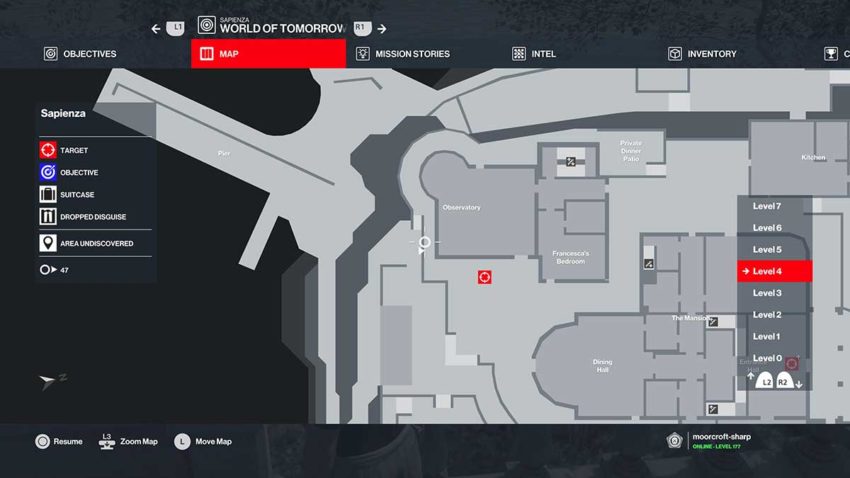
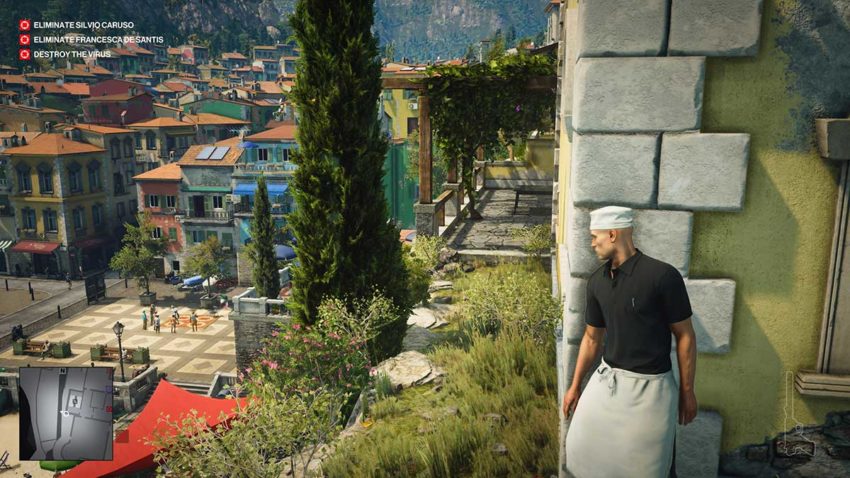
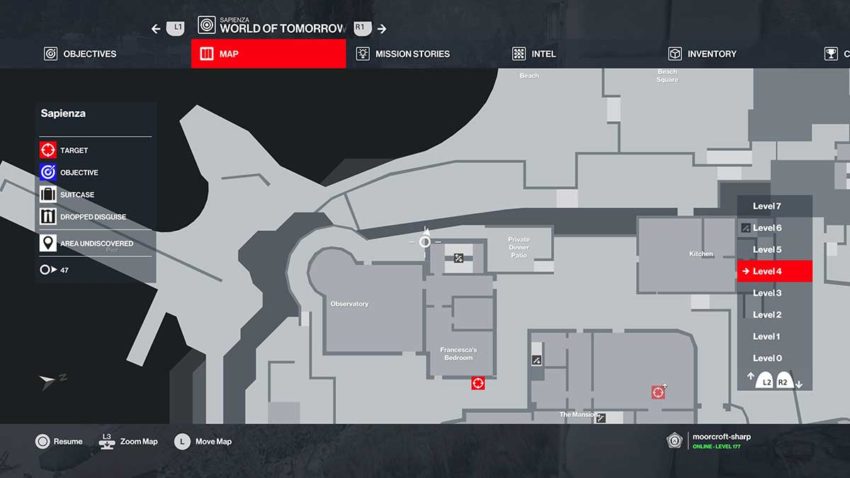
From your starting location, run to the building on the right, where a waitress will be shouting at a man on the top floor. The door to the building is open, and you can unlock the first door you come to on the first landing. This is an ICA safehouse, so Agent 47 can get in without using the lockpick. Next, go through the bathroom and onto the roof. You can vault up to the apartment above from here and take the waiter’s disguise sitting on the bed. See below for a map reference for this location.
Once you’re disguised, come back onto the roof and drop down into the villa building, the yellow property that’s to your left when you leave the ICA safehouse’s bathroom.
Step 2: Get some poison and some tinned tomatoes
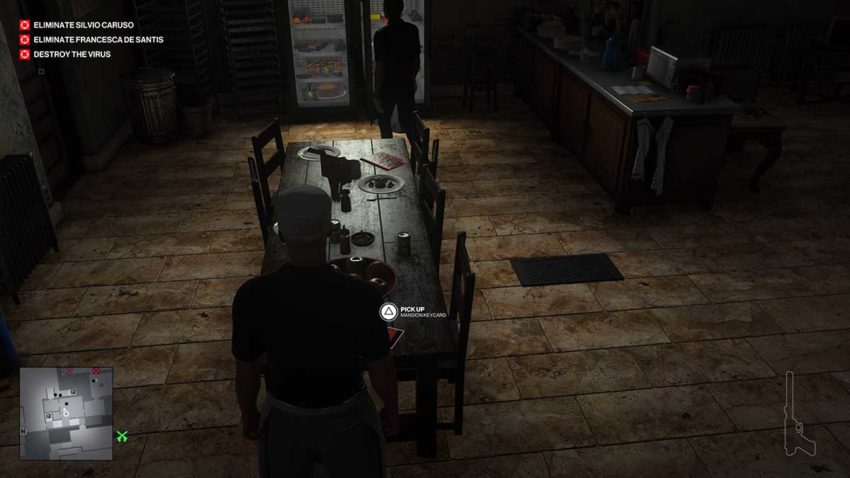
From the wall you dropped in from, take the first door to your left and go down the stairs. Take the keycard from the table, head into the room on your right, and grab the three cans of tinned tomatoes from the shelves. Next, go back up the stairs to the door you entered through, but turn right and head up to the kitchen. You need poison to kill the first target, so run out of the kitchen and straight forward to the lower terrace where there’s a table.

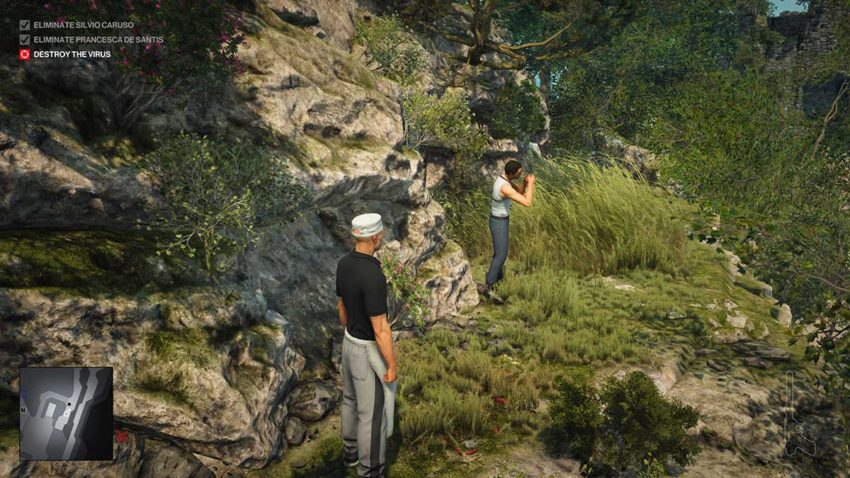
Follow the path around the side of the villa, but be careful to watch out for the camera that can spot you. Shoot it out with your gun. When you come to the point where you can see the golfing area, check to see if the golf pro is standing near the cliff edge. If he isn’t, use a coin to distract him into the tall grass and subdue him. When the golf pro comes over, subdue him and hide him in the grass too. See below for a map reference for this area.
This is a point when you might lose your Silent Assassin rating due to a glitch. If the golf pro is hanging around when you arrive, run ahead and get the poison and take the pair out when you return this way. Make sure you pick up his phone when taking him out because this is essential for killing the second target.
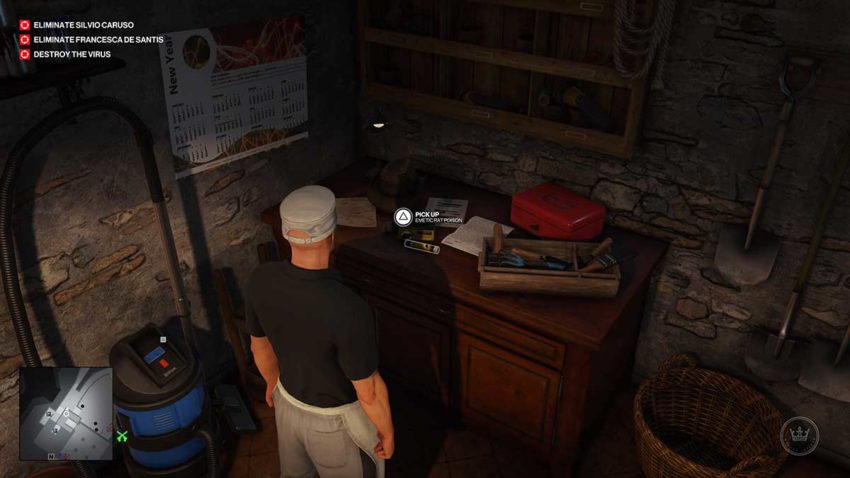
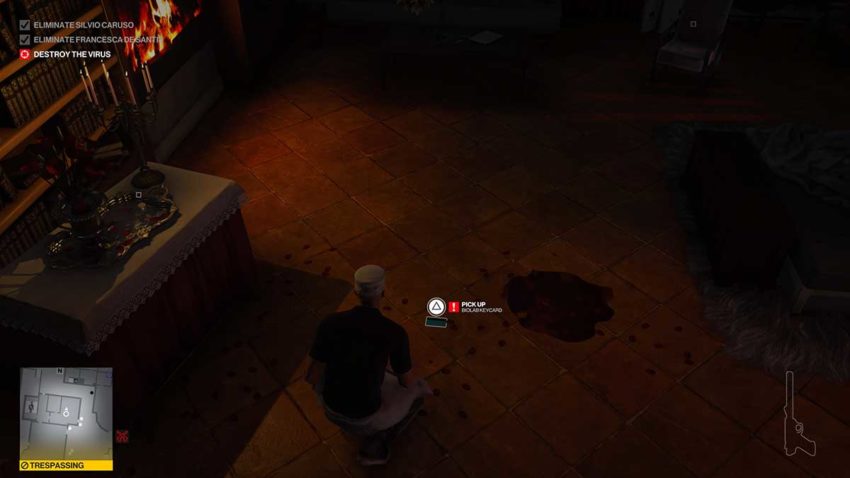
The poison is in the gardener’s shed at the back of the property. Follow the path through the golf area, and you can’t miss it. The rat poison is on a table in the lower part of the shed. Once you’ve picked it up, run back to the kitchen. See below for a map reference for the rat poison.
Since you’re disguised as a waiter, you can put the rat poison into the large saucepan in the kitchen without arousing suspicion. Then, head back out the kitchen door and ring the bell to draw in your first target when you have.
Step 3: The first kill
Head back along the side of the villa until you find the first container. Wait by the wall there for the target to eat their food, complain about how horrible it is, and then feel sick. They’ll walk along this way and throw up over the cliff. There’s a chance that they may bring a bodyguard, but this isn’t always the case. If they do, subdue the bodyguard and push the target off the cliff. Dump the guard’s body in the container if they’re there. This is another area where the glitch can cause you to lose your Silent Assassin rank. See below for a map reference for this location.
Step 4: The second kill
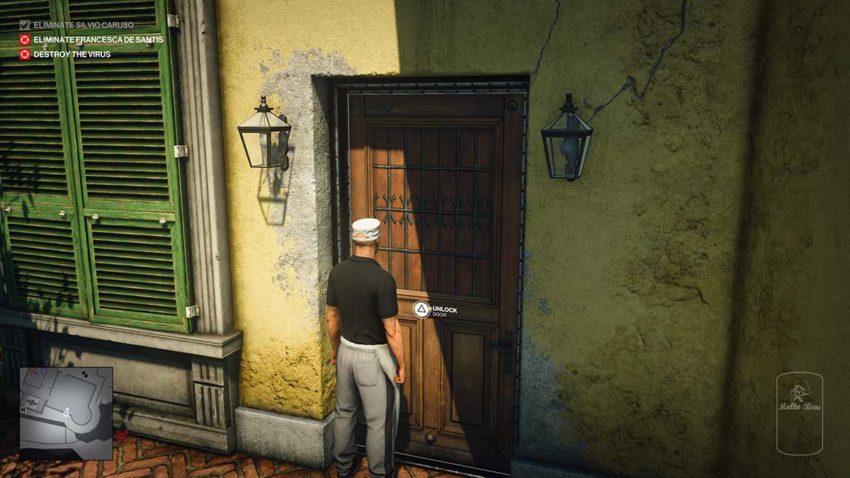
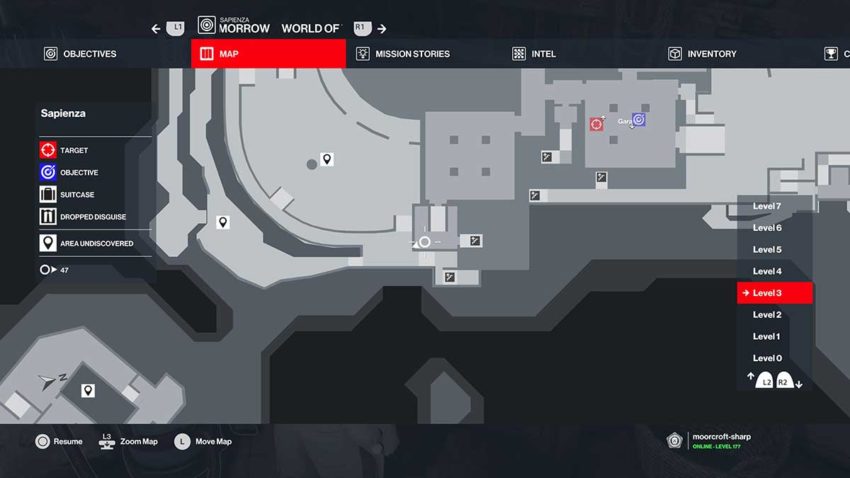
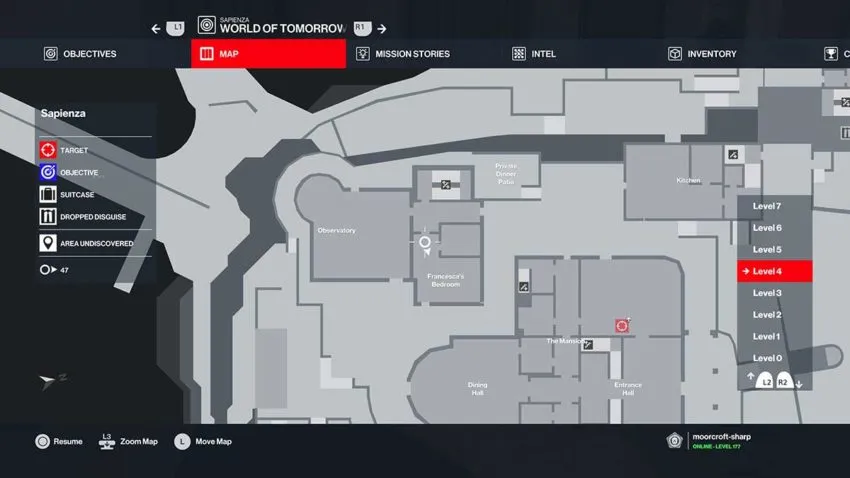
There’s a door nearby this location that you can unlock. Once you have, head inside and go to the left. As you do, bring up the golf pro’s phone and call your second target. This will cause them to come to their room through the door ahead of you and to the right in the corridor. Go inside and wait in the bathroom on the left for the target to come to you. See below for a map reference for their room.
Use instinct to track your target. They’ll come into the room alone. You can then come out of the bathroom and kill them however you want. We used a circumcision knife from the previous room you walk through. Dump the target’s body in the container and pick up the keycard she drops before returning to the cliff edge the way you came.
Step 5: Kill the virus
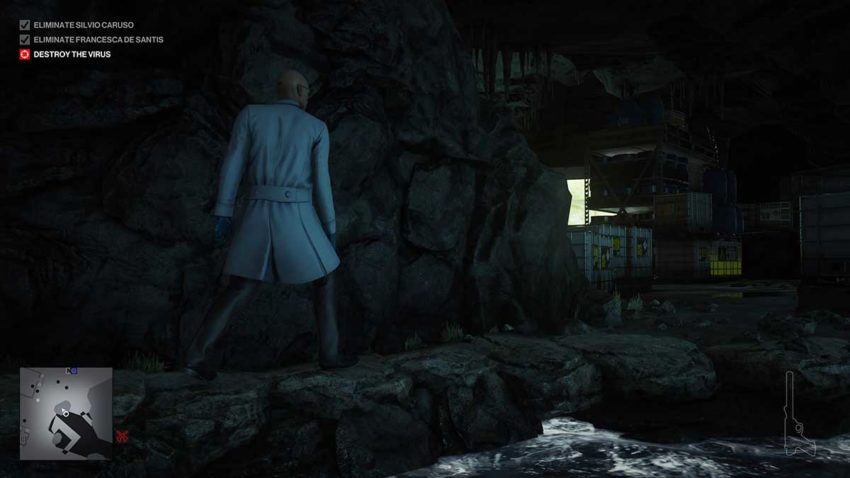
To get to the virus, go to the point where you took out the golf pro and the guard. There’s a path leading down the side of the villa here to a guard and a door. Use a coin to draw the guard into the grass and subdue him before taking his disguise. You can then use a keycard to get through the door and into a cave.
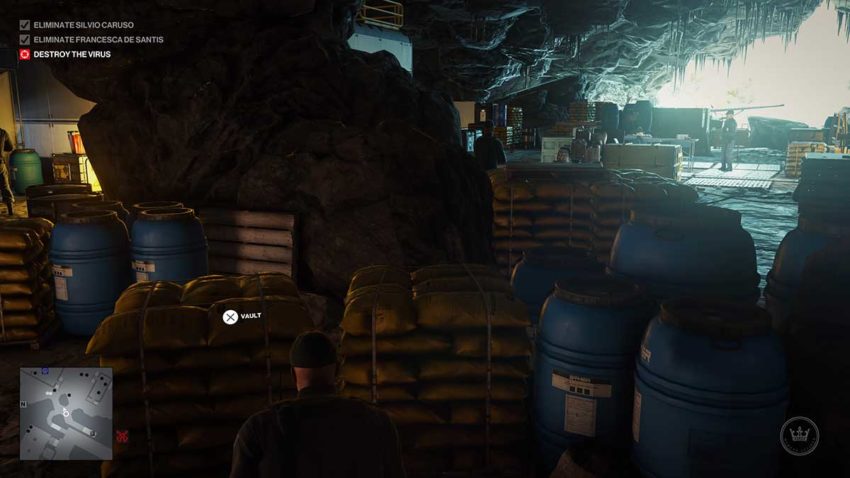
Follow the cave and take out the soldier. Dump his body in the container and then take his disguise. Follow the stars down, and you’ll find a facility where the virus is being made. Sneak behind the cover to your right and pick up the rat poison by the first building. Then, go up the stairs to the top of this building.
There’s a scientist on top of this building. Subdue him and dump his body in the nearby crate before taking his disguise. This will allow you to sneak around most of the facility unimpeded. Make your way around to the plane and use the ledge behind it to sneak over to the second part of the cave.
Now, get to the scientists talking on the platform. Wait for them to finish their conversation and move on to make movement easier. You need to go inside the building on your left but wait until all the scientists who spot you have gone away. You need to use a keycard to get inside, so you’ll definitely be spotted if you do this at the wrong moment.
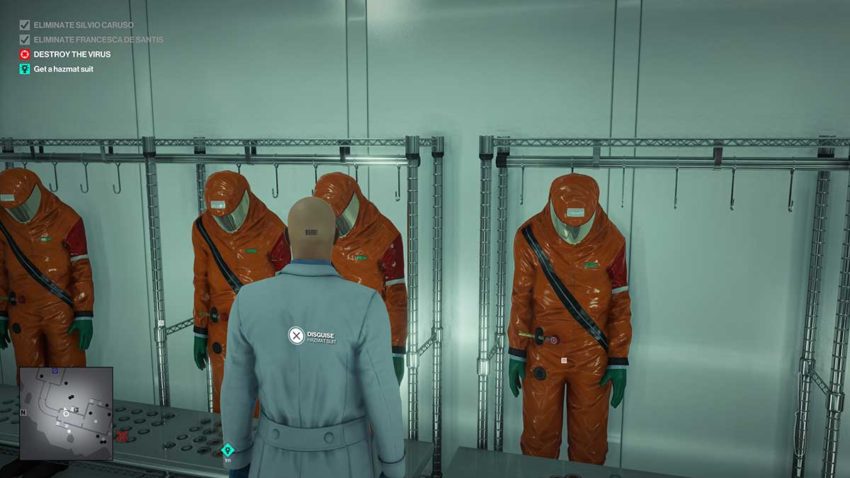
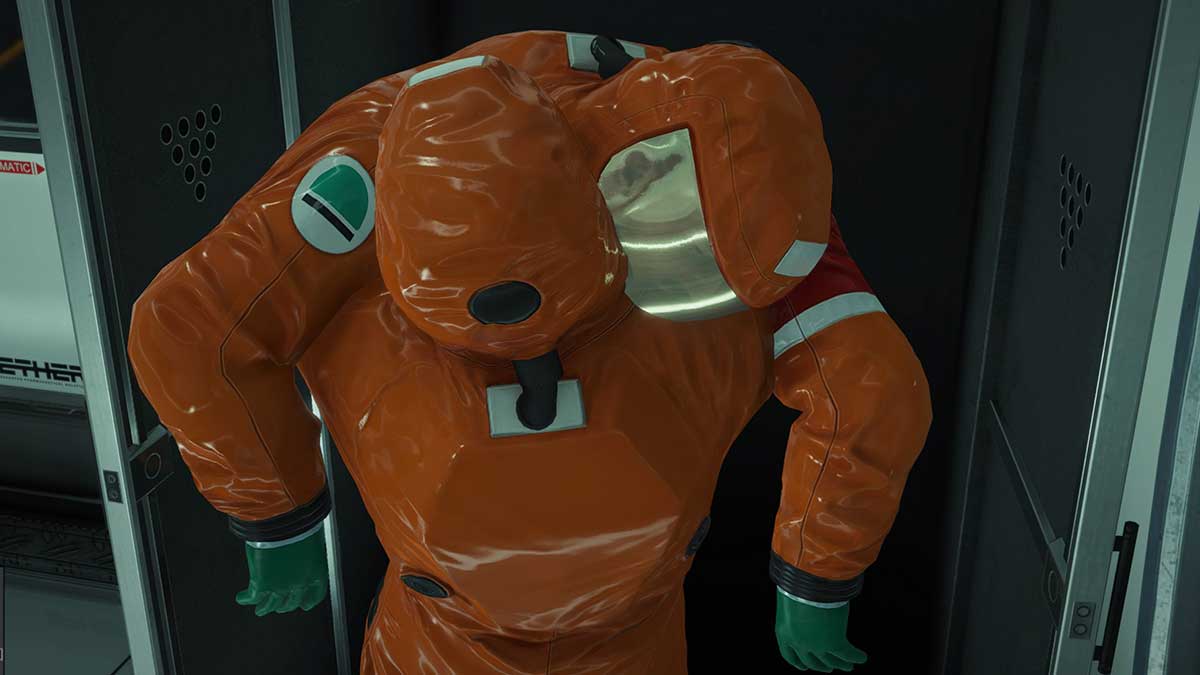
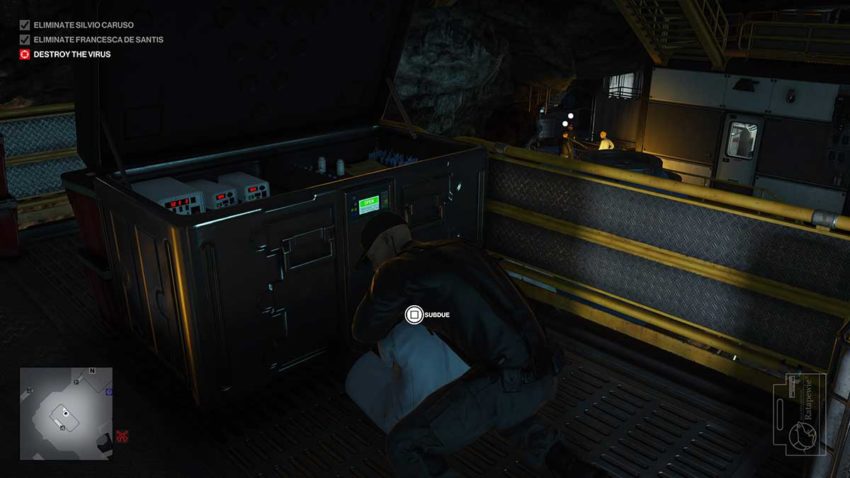
Go through the lab inside and into the hazmat suit changing room. Put a hazmat suit on, and you can then go through to the area where the virus is contained. If you see an NPC in this area, quickly subdue them and put their body in the locker. One less pair of eyes on you is always a good thing.
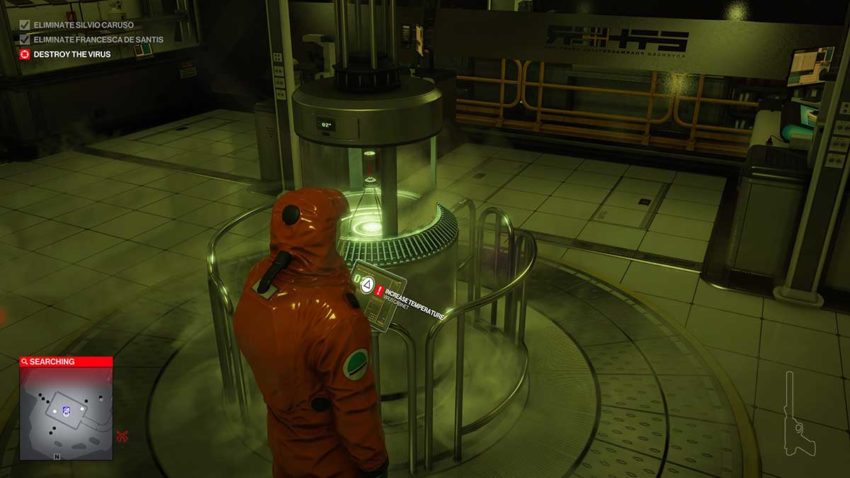
When you get through to the lab, you’ll see the virus in a machine in the center of the room. You need to sabotage the computer on the right-hand side of the room and poison the rats on the left-hand side to distract the other hazmat NPCs away. Watch out for the one on the left because he can see through your disguise. When they’ve moved off, set the temperature of the virus to go higher and leave. The virus will explode in a few seconds, giving you time to get to the plane and make a swift exit.