
The main Easter egg in Call of Duty Zombies is always the biggest and most anticipated challenge in new maps. Call of Duty: Black Ops Cold War’s second major map Firebase Z continues this tradition, tasking our Requiem Task Force with saving Samantha Maxis.
Before we begin, there is not much you need to prepare for before you start the game loadout-wise. We prefer the Gallo SA12 in Zombies, but it is not very useful in the final boss fight for this map. That being said, we will grab the wonder weapon, which will more than get the job done for us there. This Easter egg is possible to complete either in a group or solo.
How to complete the Firebase Z Easter egg main quest
Turn on power/Obtain the RAI K-84
During the first six rounds or so, you need to focus on turning the power on in the Firebase. If you need help with this most fundamental aspect of Firebase Z, we recommend playing at least a few times before attempting to complete this Easter egg.
Also, at some point, at least one person in your team needs to get the RAI K-84 wonder weapon. Build one yourself for free, or you can use one from the Mystery Box or legendary trial rewards. You can also potentially get it from the bunny secret room Easter egg if you are lucky.
We recommend doing trials from the Helipad computer until you get one. Complete these trials until you get a legendary reward and redeem it for a chance at the wonder weapon. If you don’t get it, you will likely get a free perk, which is helpful. You actually won’t need the gun until much later. Just be sure to try and get one as the game goes on.
Making a truth serum
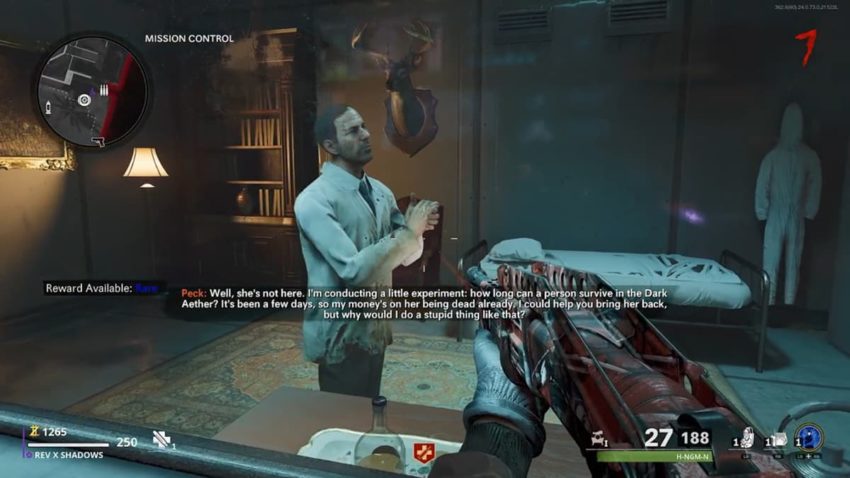
When the power is on for the whole Firebase, you will need to do a little back-and-forth walking. Go to Ravenov in the starting village and talk to him. This will also activate the Pack-a-Punch machine. You will hear from Peck to meet him in Mission Control. He is hiding behind bulletproof glass in a bunker, so talk to him until he reveals he teleported Samantha to the Dark Aether days ago and tricked us into helping him.
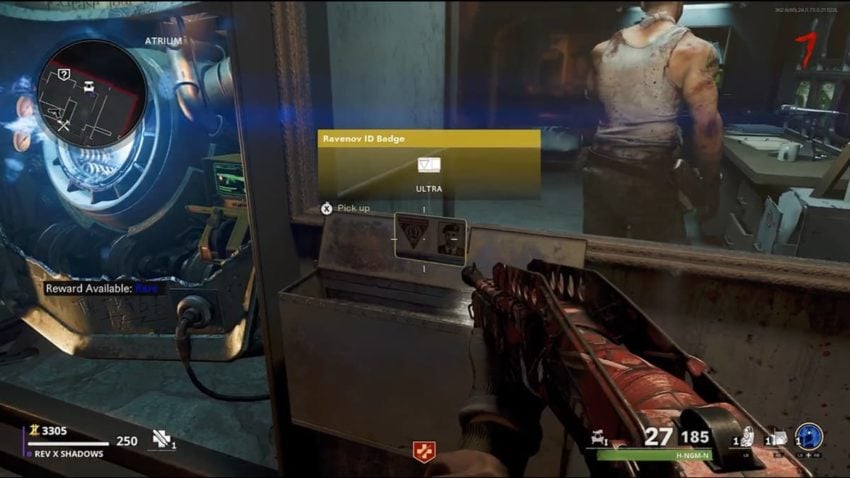
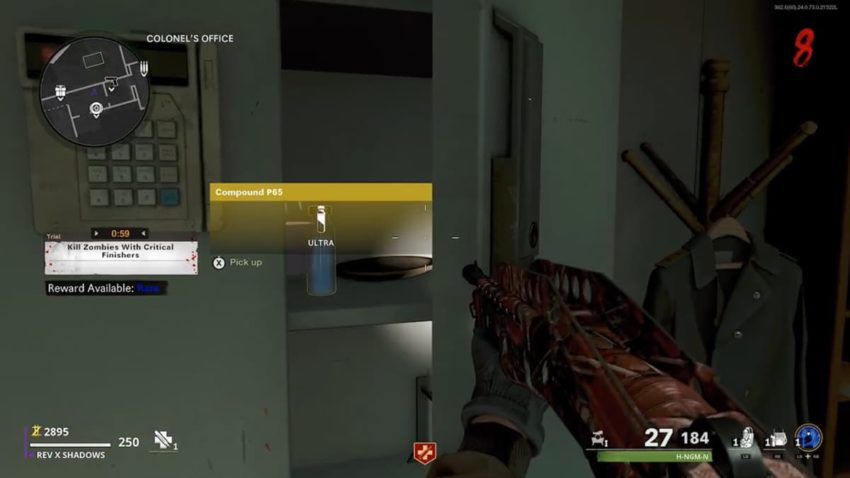
To find a way to bring Samantha back, we are going to create a truth serum. Go back to the village and talk to Ravenov. He will give you a keycard.
You need to open three cabinets throughout the map and grab the compounds inside. The cabinet locations are as follows:
- Across from Ravenov in Equipment Storage
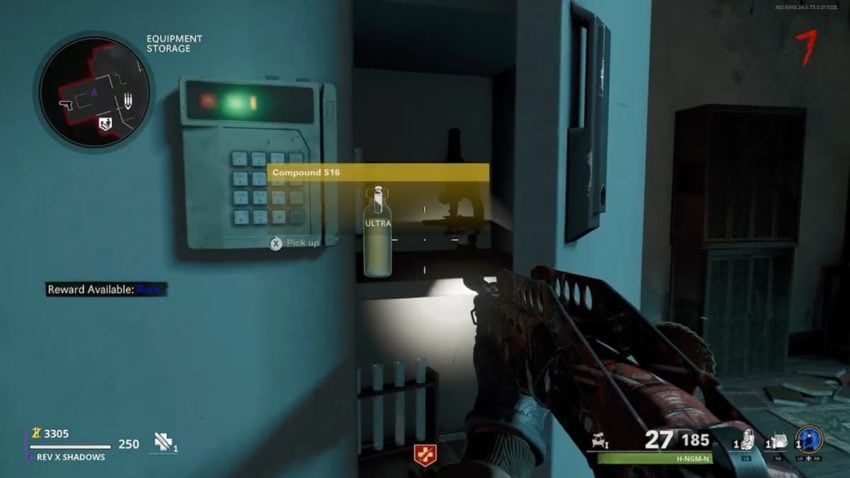
- Next to the safe in the Colonel’s Office
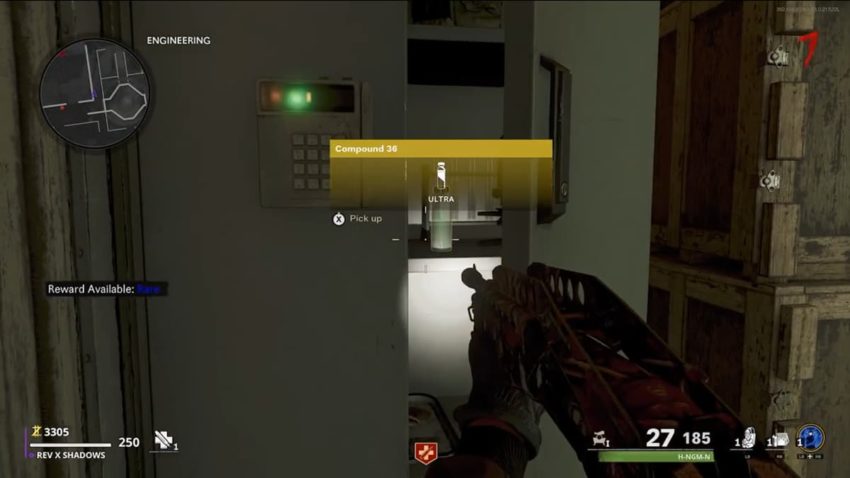
- Near the window in Engineering
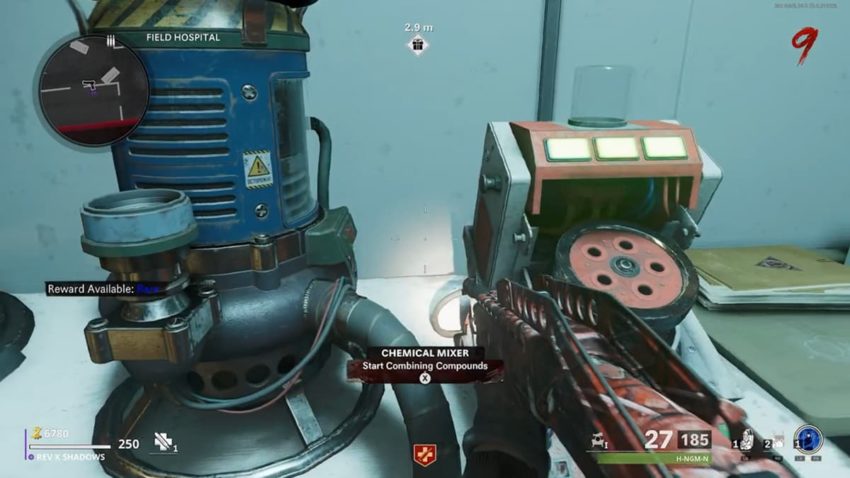
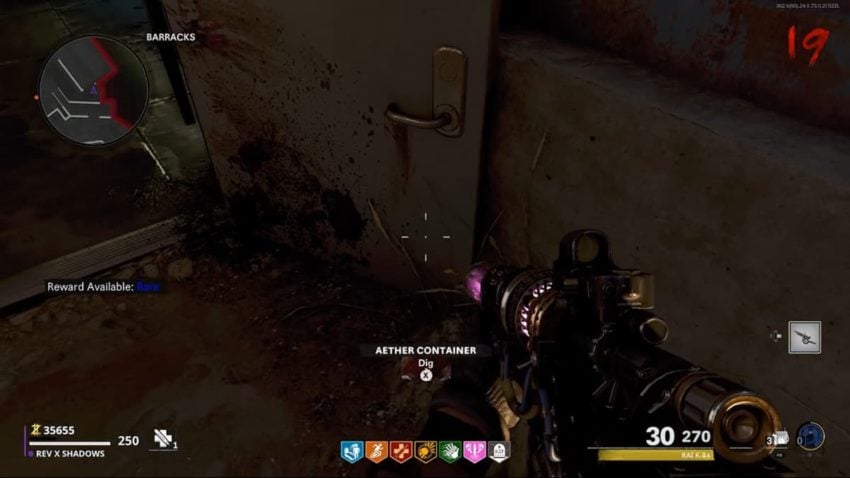
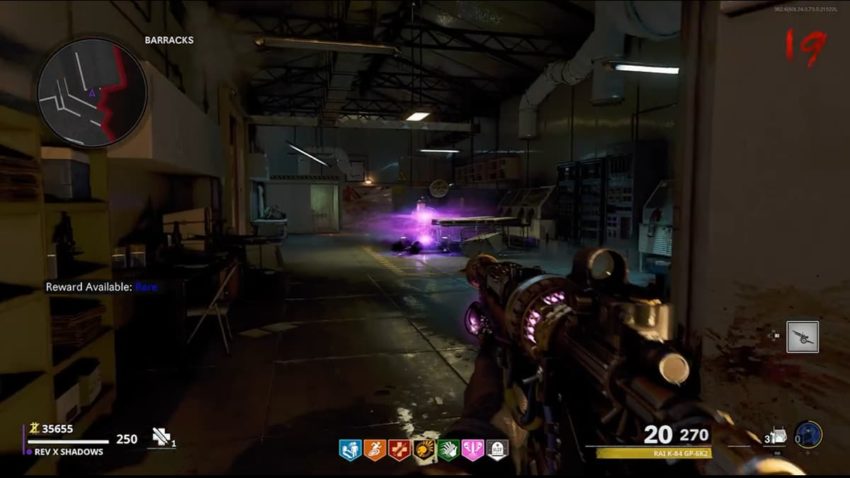
With all three compounds in your inventory, make your way to the Field Hospital in the Barracks area. Interact with the red mixer on one of the desks to begin combining them. When you start this, a group of hellhounds will spawn on the map. Eliminate them and survive. Interact with the vacuum device and pick it up.
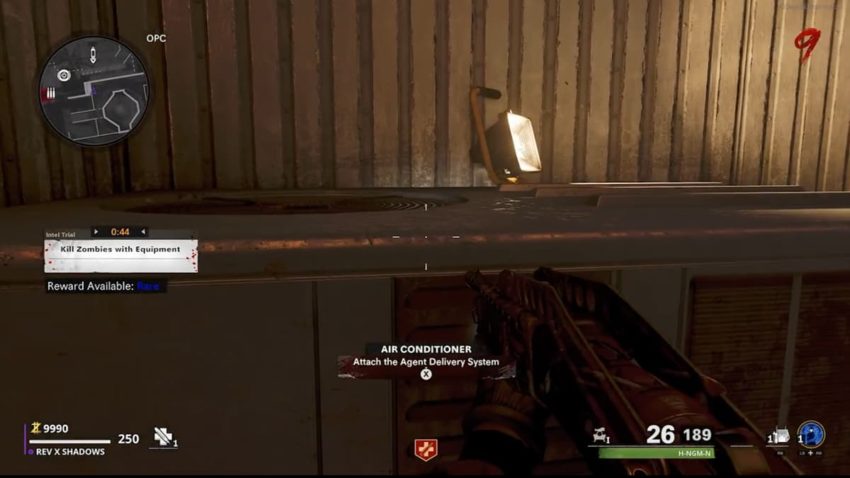
You need to place the vacuum device on an air conditioning unit that leads to Peck’s bunker. It can be found to the right of the entrance to Mission Control from the Planning Offices.
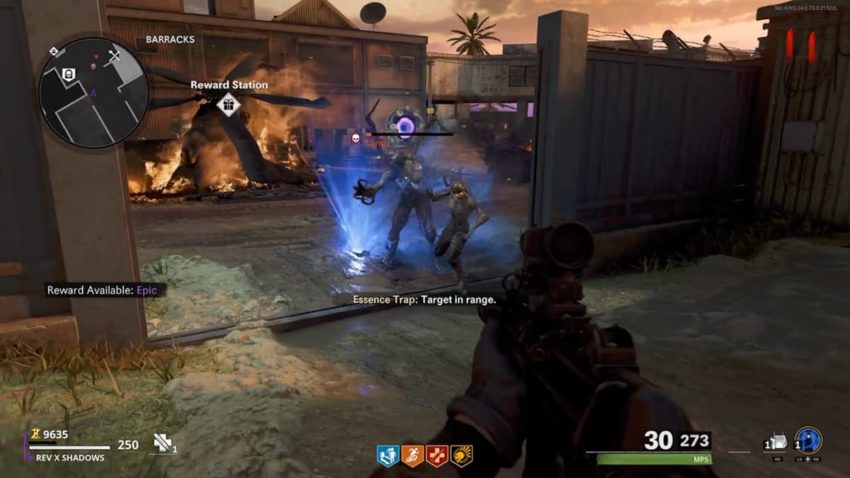
Capture the essence of Mimics
Talk with Peck, who will begin hallucinating and dancing. Wait for the chance to speak with him, and Weaver will ask what to do. This next step is easily the most aggravating part of this whole Easter egg, mostly if you are playing solo.

Go to the Data Center’s top floor and find the console with a brain image on it. When you get close, Peck should start talking about it. Move forward and interact with the machine, and four Essence Traps will pop out.

Grab an Essence Trap. It will replace any tactical equipment you currently have. If you are playing with others, they can grab one too. It doesn’t matter which you hold as you will be coming back here to empty and reuse it. You can think of these as Pokéballs from Pokémon. They are going to act very similarly with how we use them.
There are three separate people who have been infected, died, and turned into Mimics that we need information from. We need to trap them in these devices and input them into the console to access their memories to find Samantha in the Dark Aether. However, this will not work on any Mimic that spawns into the map at the start of a round.
You need to run around the map and find sections that have multiple items lying on the ground. Locations that can potentially have these are in the starting village, Open Lot, or Motor Pool. These are mimics that are waiting for the chance to attack you. If you walk over them and nothing pops up, keep exploring that area. Eventually, one of the Mimics will jump up.
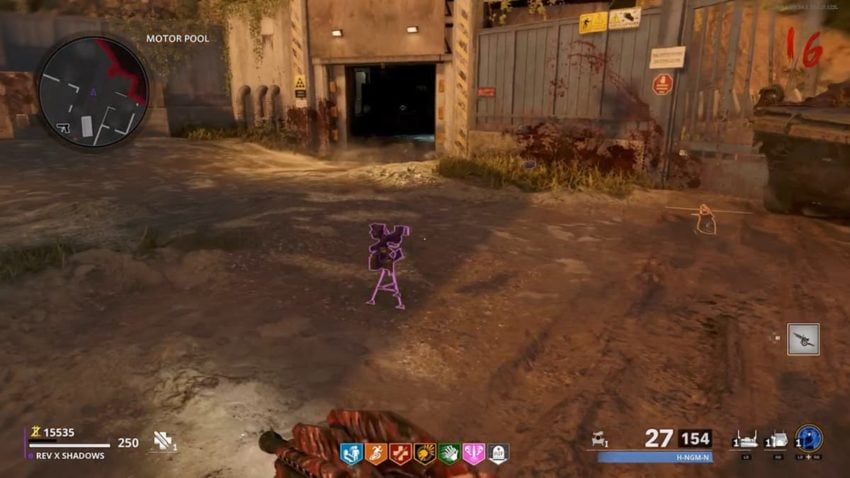
It is very important that you do not kill the Mimic when it appears. If you do, you will need to go to the next round for another chance. Instead, you need to damage the Mimic until its health is very low. When it is about to die, throw out the Essence Trap and activate it to begin sucking the Mimic in when it stands over it.
Wait for the device to say that the monster is trapped, and you can grab it and have three minutes to bring the trap to the console we got it from. If you pick it up too soon or the Mimic has too much health, it will pop out of the trap — just like Pokémon.
When you return to the console, be sure you interact with the machine away from the other Essence Traps, or you will drop the one you captured the Mimic in. When you insert it back in, a memory will begin playing. If you are playing with subtitles on, you need to look out for quotes from characters named Sokolov, Brahms, and Zhabin. If you do not have subtitles on, Weaver will let you know when the recording ends, whether that is a memory you needed or not.
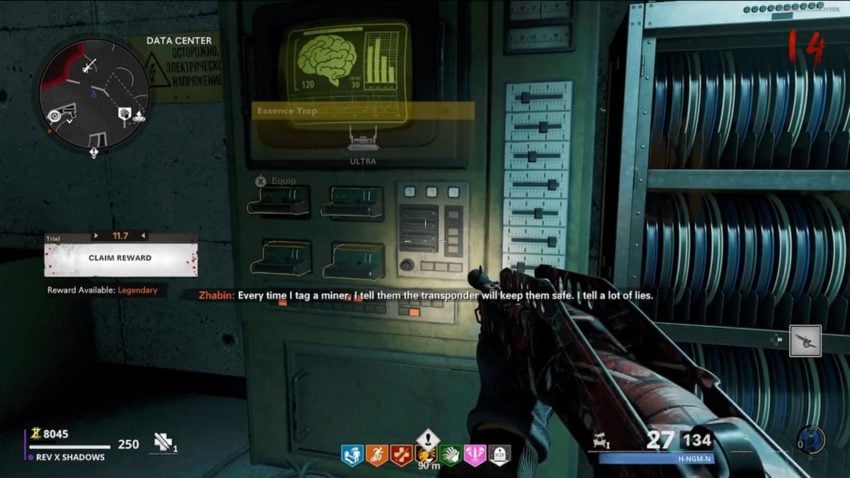
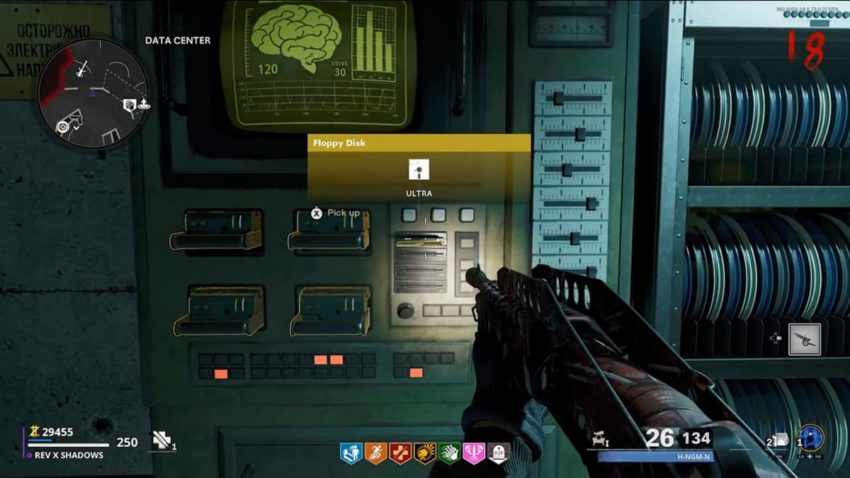
If the message is from the wrong person, do not worry; just continue catching Mimics until you get all three needed names. Remember, if you kill a Mimic, you will need to start the next round for the group of items to spawn in again, most likely in a different location. We also ran into a bug where sometimes the Mimics would explode and die the moment they spawned in, but it fixed itself after a couple of rounds, so you shouldn’t need to start the whole match over. When you have heard from the three correct characters, a Floppy Disk will pop out of the console you need to grab.
Find more Aetherium Crystals
By this step, at least one person on your team will need to have the RAI K-84 wonder weapon on them.
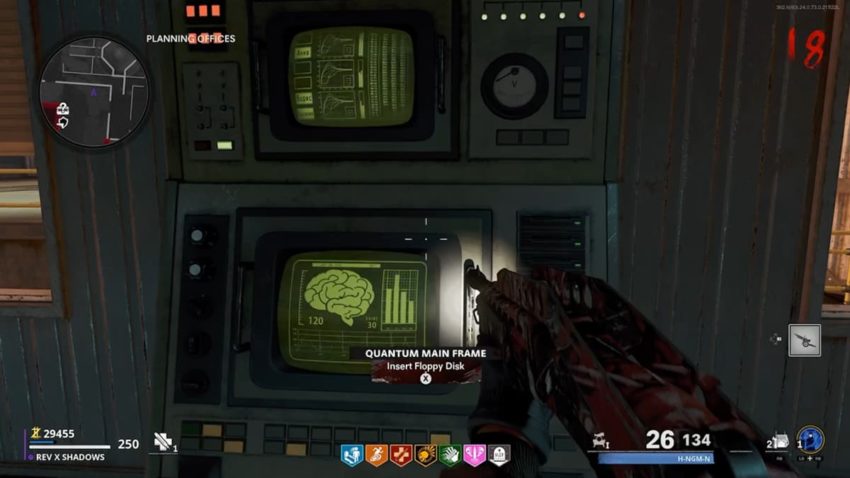
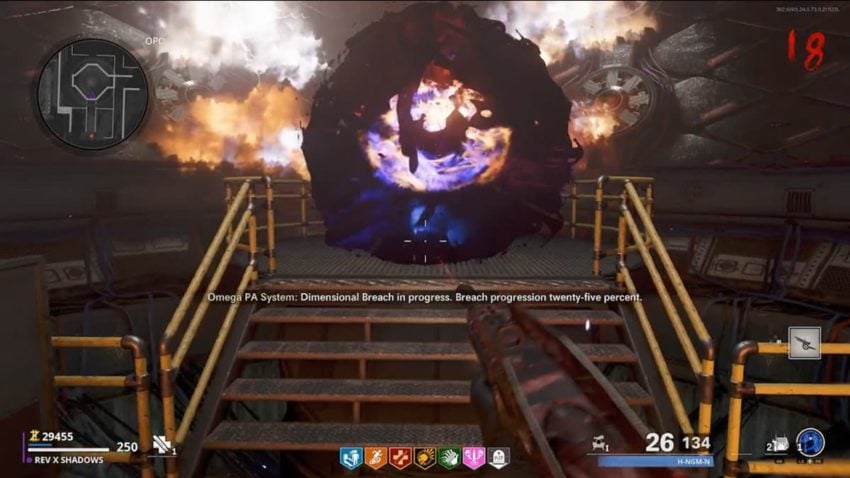
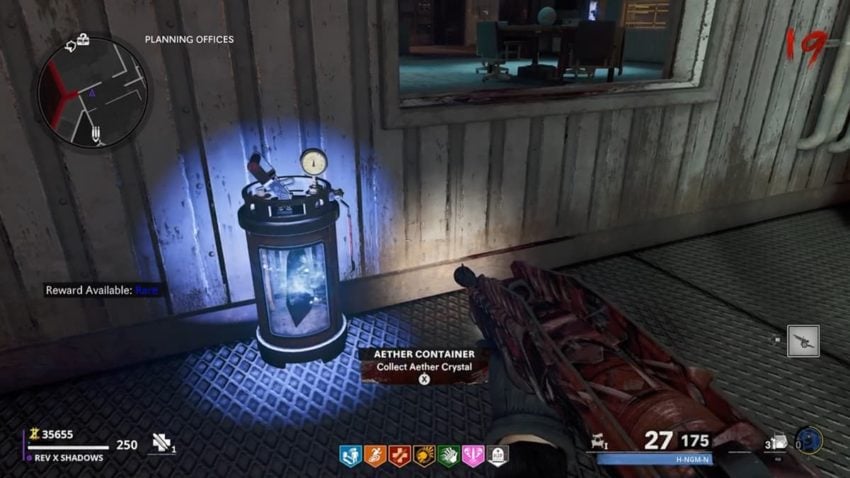
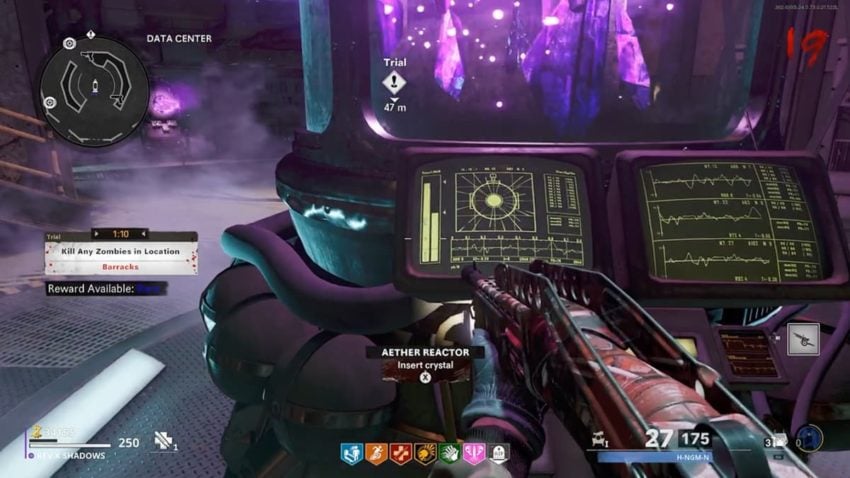
Take the Floppy Disk to a console with the same brain image on it in the Planning Offices. The structure outside the window called the OPC will open its doors, and you can see a portal beginning to open when you walk in. Unfortunately, we need more Aetherium Crystals to power the portal.
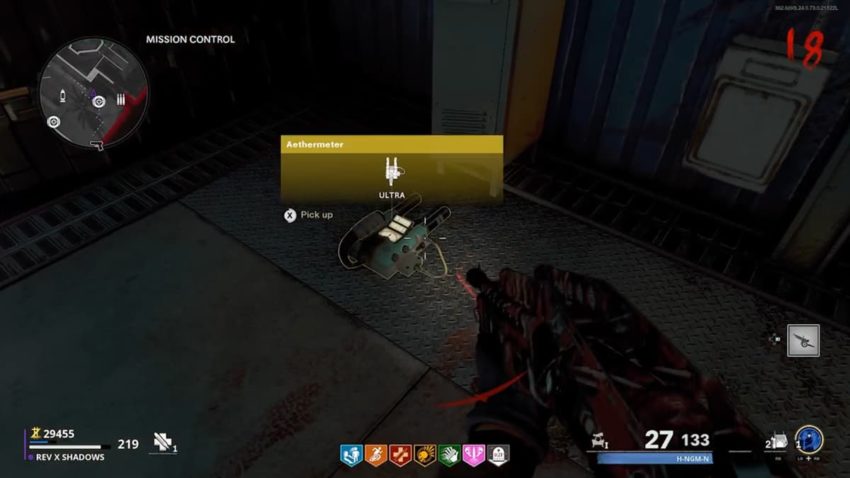
Go talk to Peck, who seems to be still affected by the truth serum and says to find the crystals we need. When he is done talking, wait for Ravenov to tell you a code to open a locker to the left of the window Peck is in. Don’t worry about remembering the code; all you need to do is interact with the locker to open it. Pick up the Aethermeter that drops on the ground.
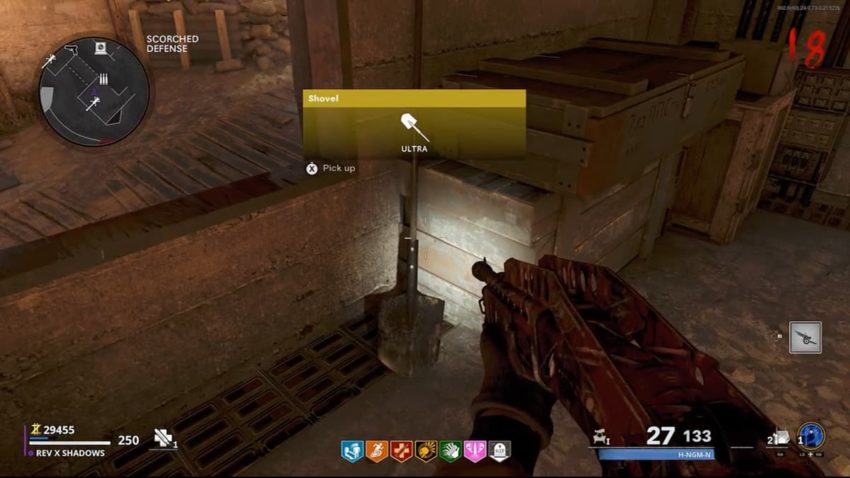
Before we find the crystals, we first need a shovel to dig them up. Go to the huts in Scorched Defense outside Mission Control and pick up a shovel inside.
We will go over obtaining the crystals from easiest to hardest, but you can do this in any order.
First, go into Barracks and find the dig spot by the Field Hospital door closest to the stairs to Data Center. Dig up the crystal, and it will fly into either the Field Hospital or one of the Barracks buildings. Do not enter the building, or the crystal will fly away.
Someone with a RAI K-84 needs to fire the alternative lobbing shot at the crystal from a distance, which will stop it from flying out so you can run up and grab it.
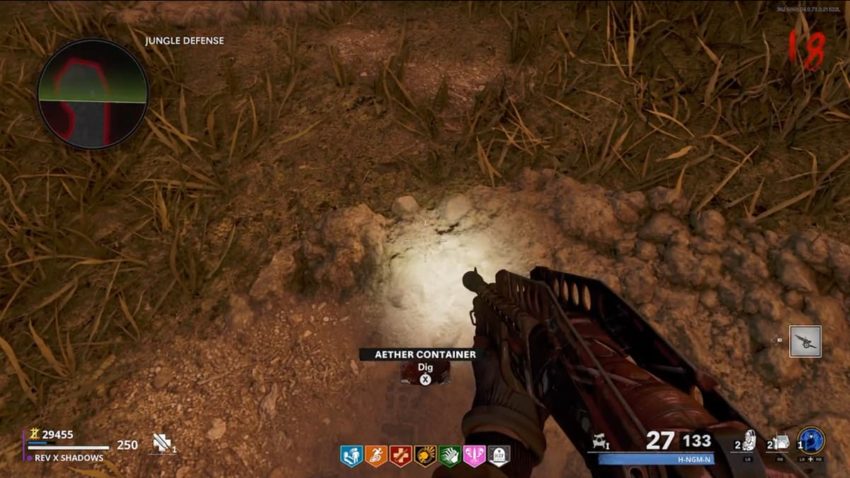
Next, go to the Open Lot and dig near the window into Engineering.
A blue crystal will pop up, and identical crystals will appear all over the Open Lot. You need to find the one container that has no black mist in it at all. That is the only one that will allow you to progress. For reference, see the screenshot below.
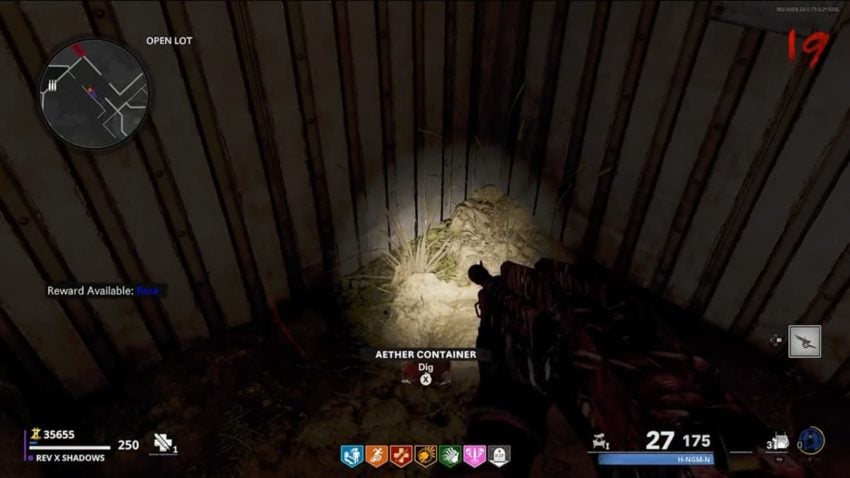
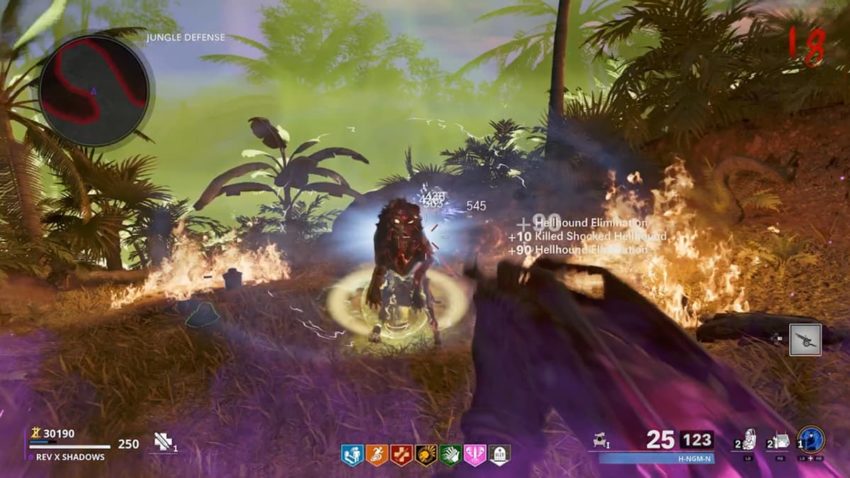
Finally, the yellow crystal is located in the middle lane of Jungle Defense. If you are playing with multiple people, make sure they are all with you when you dig it up; otherwise, they will take damage until they die.
A yellow dome will appear around you, bringing in Manglers, Hellhounds, and zombies. Survive this wave until the dome goes away to then pick up the crystal. Simply just focus on surviving in this bubble. If playing solo, things are not nearly as intense as with a group. The small area gets crowded fast with more people.
Redirect a satellite
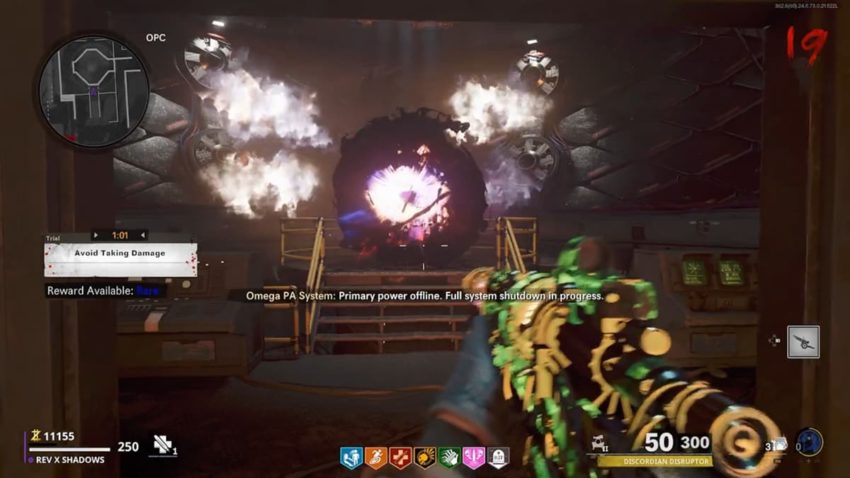
With all three crystals in tow, return to all three generators you activated to turn on the power and interact with them to insert the crystals and overload the machines. When done, run to the OPC and it will shut down, leading Peck to reveal that he tricked you again.
Now it is crucial that you are ready for the boss fight before going any further. Get your weapons, perks, and Pack-a-Punched weapons you want to take into the boss fight. Remember, you will need at least one mid-range capable weapon to output damage to the boss.
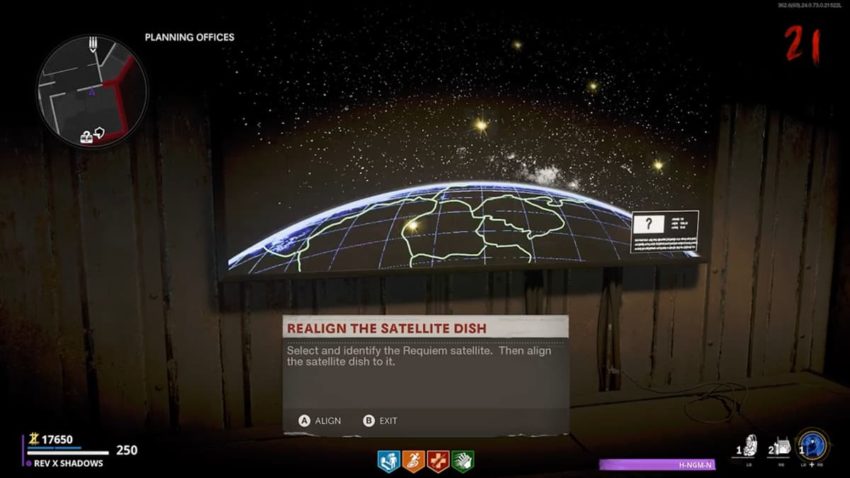
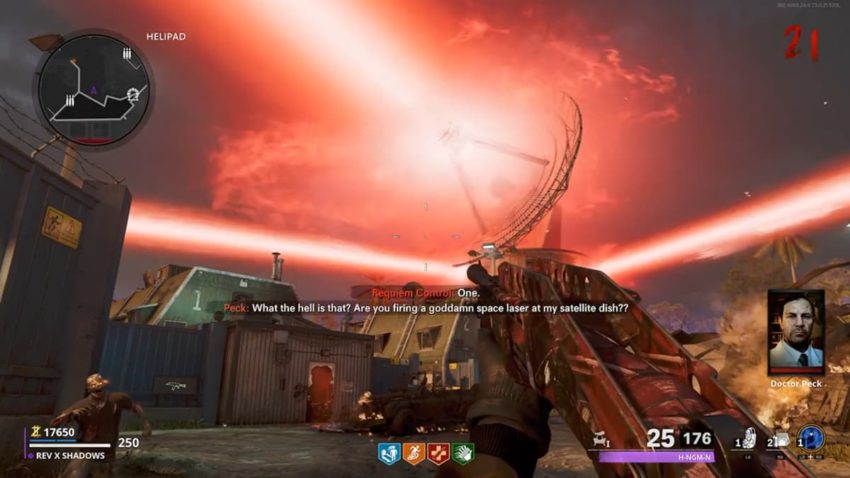
Wait for Weaver to ask about a new satellite the director is setting up and go into Planning Offices. There is a computer you need to interact with to bring up a screen that redirects the satellite. You need to move the cursor to the yellow icon that brings up a question mark and confirm it. If playing solo, be fast, as the zombies will still attack you while you are on the screen.
If you go outside, you will see the satellite shoot a red laser into the Firebase. When this happens, zombies will continuously spawn into the map, and killing them will not reward you with any points. Go to the OPC and interact with the console inside to start a cutscene.
Boss fight
After the cutscene ends, you will be facing off against an Orda, the same giant monster you fight around in the defense areas. The difference is, they are much closer, and this time, you are fighting them in the starting village.
The location of this boss fight is actually very beneficial to the players. You still have access to the Pack-a-Punch and Wunderfizz machines, so if you get enough points in the middle of the fight, you can run in and purchase much-needed upgrades. However, zombies, Mimics, and Manglers will frequently be spawning, so you need to be fast.
The entire time you are fighting, you can fire into the Orda, but when they open their mouth and reveal a bright light, you will deal more damage to them by firing there.
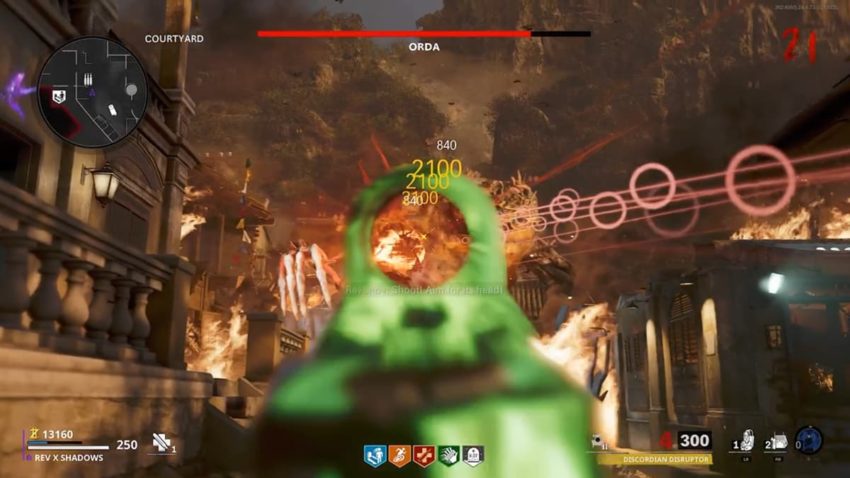
While fighting off the smaller enemies, you also need to watch out for the Orda making the same attacks they do in the defense sections. They can fire hellhounds into the arena and swarm you with damage over time. Be sure not to get too close, or they will stomp you into the ground, which will instakill you. Be sure to protect yourself by taking out the smaller enemies around you, and if you have the wonder weapon, use the alternate fire followed by primary fire to cause a black hole explosion to clear out the area.
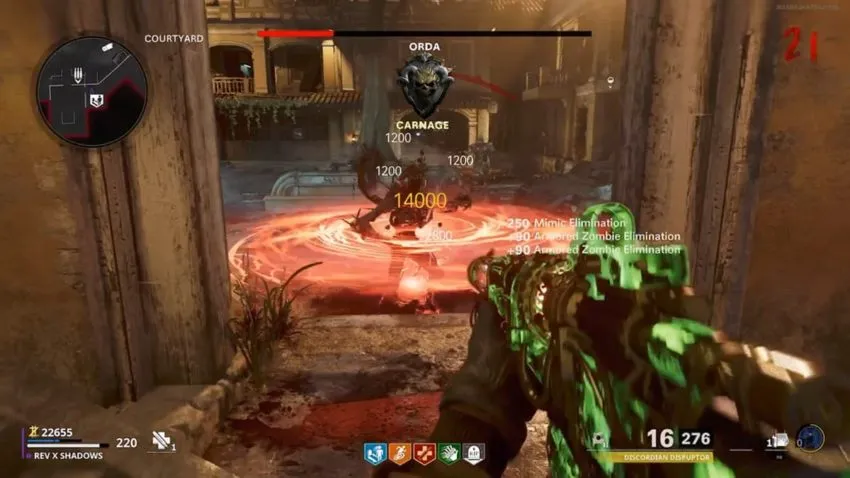
Chip away at the Orda’s health until you finish them off, and the ending cutscene will play. If this is also your first time completing the main Easter egg, you will earn a new calling card to show off to other players.
Related: How to complete the first Outbreak main Easter egg in Call of Duty: Black Ops Cold War Zombies