Shortly after completing the tutorial missions with Emem, Galeb and Leysha, you’ll be given the option to select your next stage. Choosing Emem’s mission will bring you to the Jefferson Library, home to the Hartford Chantry, a sect of Warlocks practicing and researching blood magic. While exploring the Library, you’ll come across a room with giant, moving stone circles — and it’s required to clear the stage. If you’re frustrated, read on to find out how to solve the dial puzzles at Jefferson Library in Vampire: The Masquerade – Swansong.
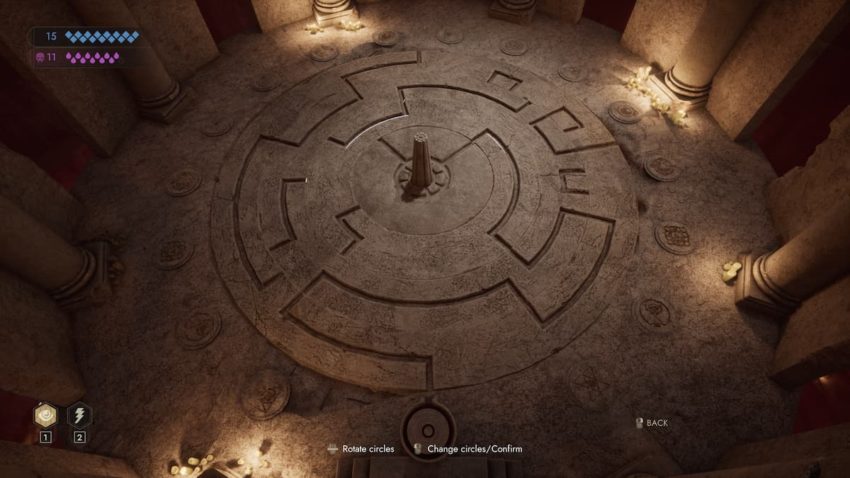
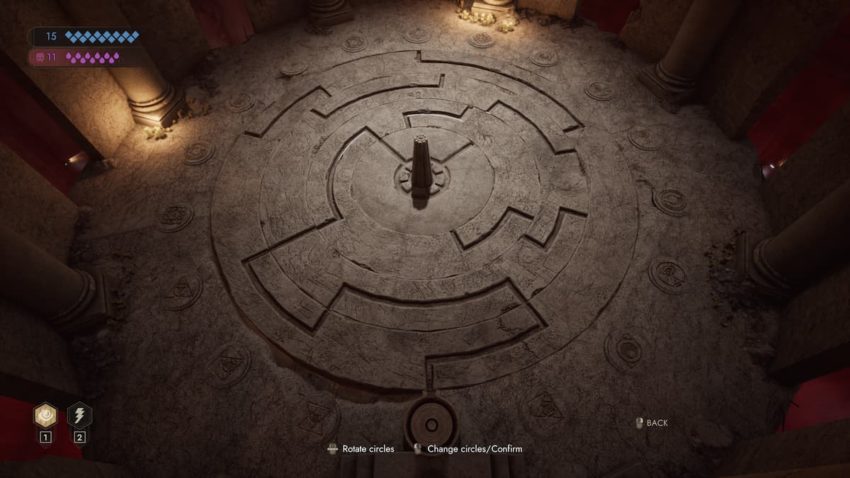
Here’s how the puzzles work: at the pedestal is a pool of blood. The goal is to get the blood from the pedestal to the middle by aligning a route that the blood can travel through. From there, you must create a new route to get the blood from the middle to the appropriate matching sigil, which is the one that your character stands on when activating the pedestal. Before we get into solutions, a hint to solve this on your own is to pick either the end point or the start point and build a path out from there.
Floor 1
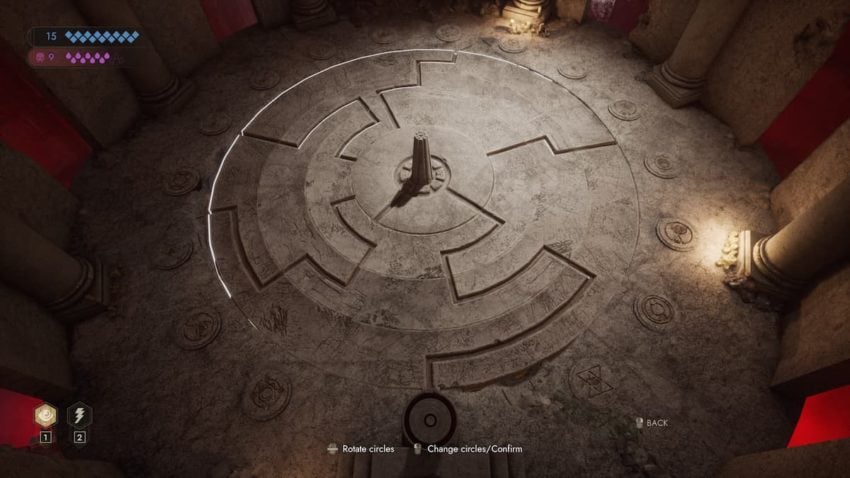

The first stone puzzle is simple — there is only one moving part, and you simply need to rotate it to drain the blood from the pedestal and then rotate it again to move the blood from the center to the appropriate sigil. The second one is where things get tricky — the giant stone circle is split into three segments. The inner and outer segments move independently, but the middle one is tethered to the inner one. Below are the solutions to get the blood to the middle, and then to the sigil.
Floor 2

Floor 3
The third and final puzzle adds an additional challenge — the inner segment rotates independently, but the middle is tethered to the inner, and the outer segment rotates the entire circle. You’ll need to line up the sections as shown in the images below starting with the inner segment, and working your way out so that when you rotate the entire thing it lines up appropriately. During our playthrough, this did not give the normal animation to show that we solved the puzzle, but we were able to use the elevator anyways.